Cold Day Bread

Bread is a misunderstood food to me. Not because of the carb-no carb debate that still rages on (for the record I could not live in a world without carbs but do try to balance that with more veggies) but because there is a myth that in order to make homemade bread, one needs to have years of experience and be a trained baker to do so.
Bread is not hard. Bread takes time, bread takes effort and bread can be picky about temperature but bread is NOT hard. If you are truly afraid of making bread, I would recommend that you check my archives and give my Basic French Bread a go before reading on because the bread I am going to make today looks SO hard but really is not.
But this bread is a time commitment, which is why I named it Cold Day Bread. Do not make this bread when you have 1,000 things to do and no time to do them all, you will just ruin it and turn yourself against homemade bread. This is a perfect bread to make on a cold day when going anywhere or even putting on pants is just too much and the biggest accomplishment will be a book or a Nexflix binge. Why not reward yourself with some amazing bakery quality bread for all that no real pants wearing you did today?

A word on this recipe: I pride myself on providing recipes that home cooks can turn out without tons of hoops, rare ingredients and gadgets galore, but for this recipe to really work you need one item. You need a Dutch oven with a lid or a similar large oven friendly pot. You need this to give the bread the right environment to bake with an amazing crust, a magical crackle and a taste you will be amazed came out of your kitchen.
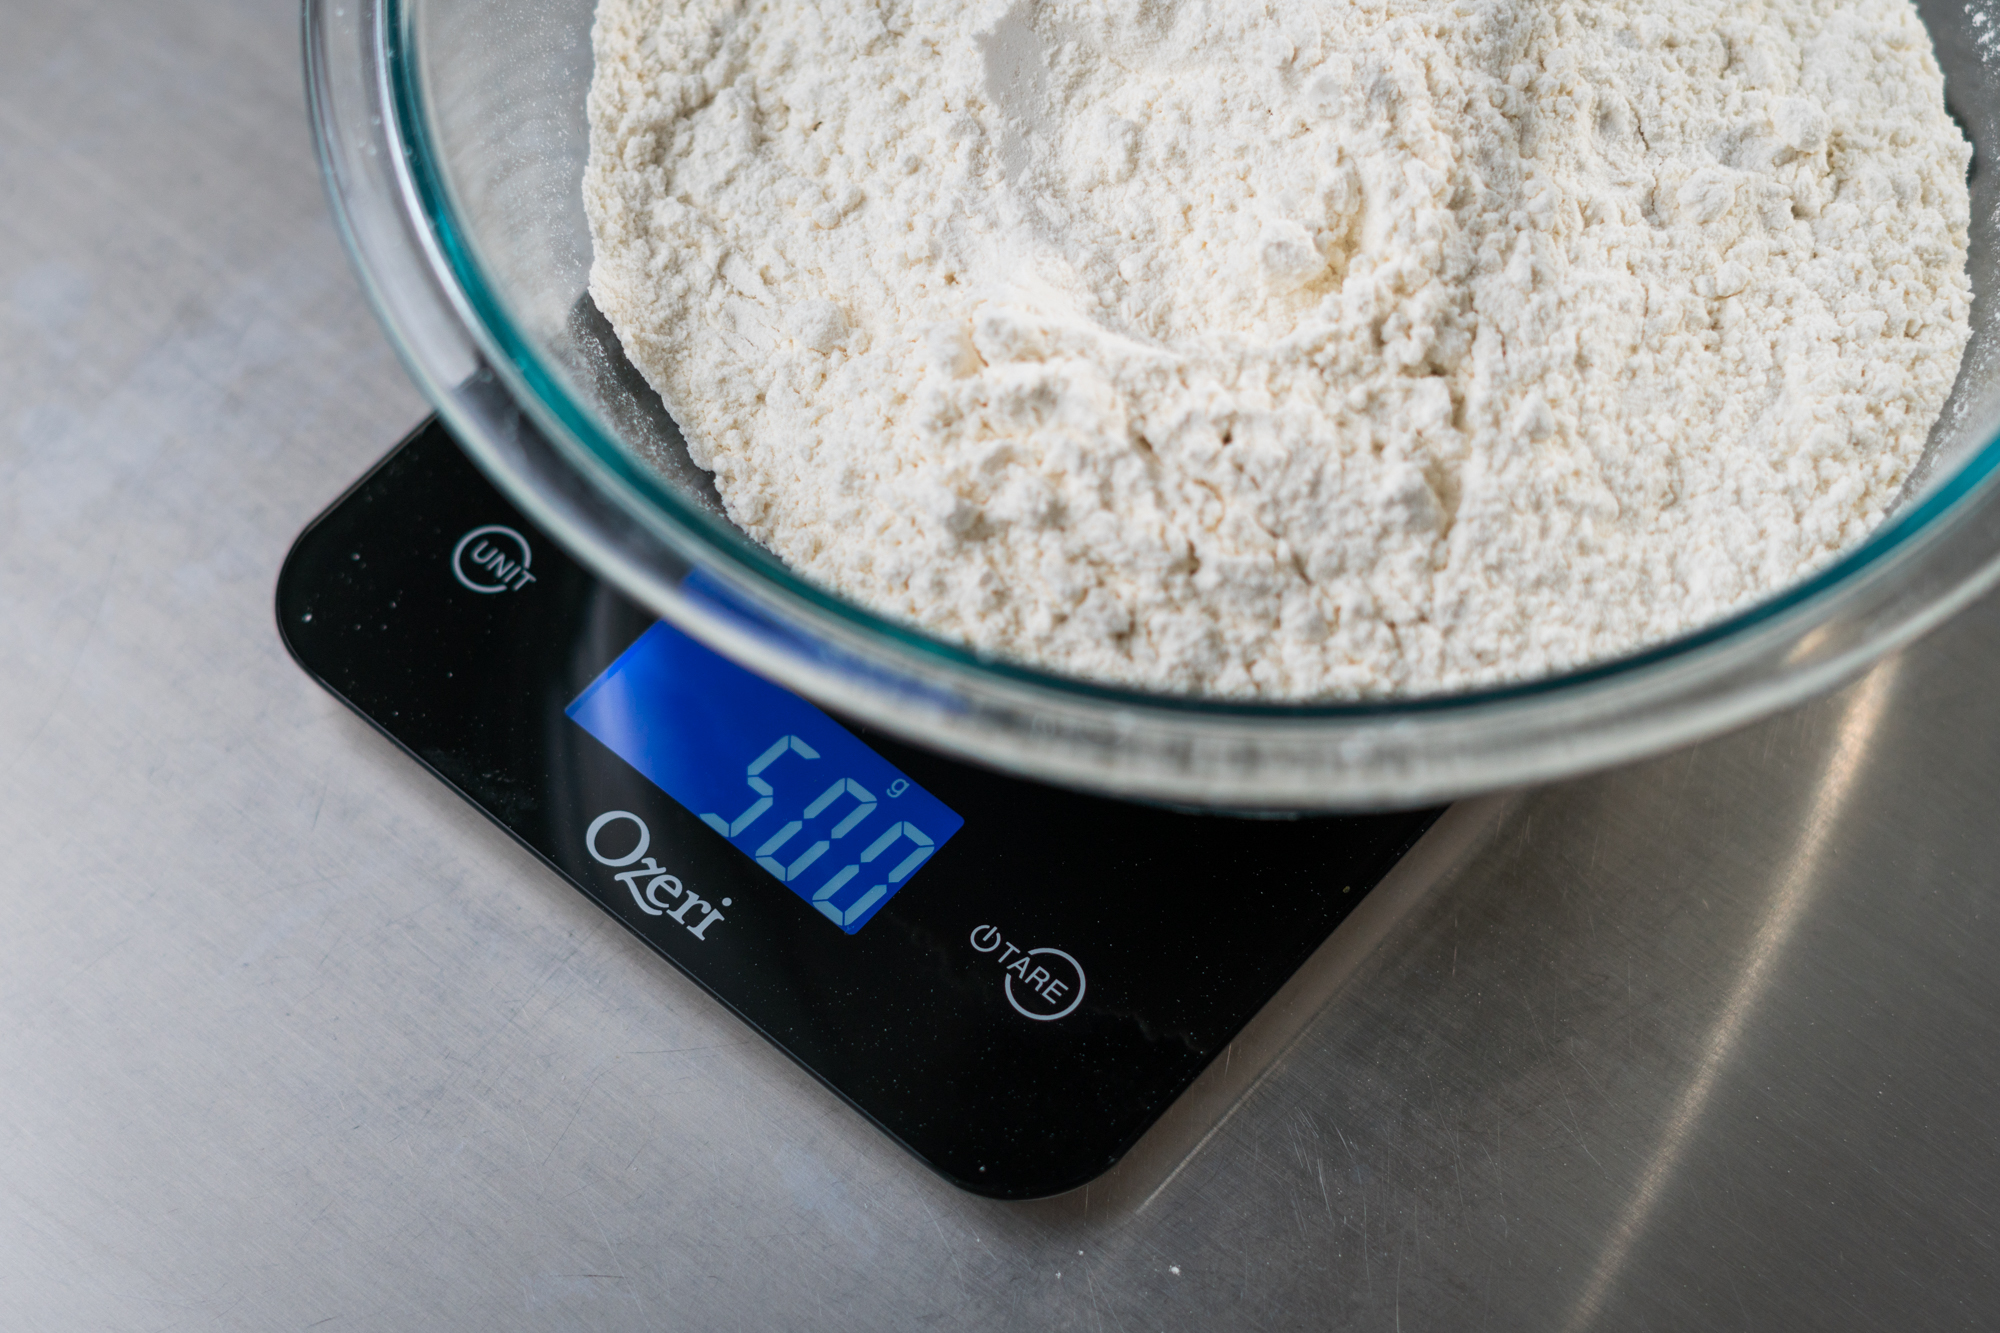
In addition, I also recommend (but do not require) having a kitchen scale as I will be providing ingredient measurements by weight. I have found that this turns out the most consistently delicious bread. I will also provide measurements in cups and tablespoons which will be as close to their weight counterparts as I can get. The bread will still be amazing I swear! If you do decide to ever make this bread again by weighing the ingredients, I think you will notice the little bit of extra having perfect measured ingredients brings to the table. And I promise this is one of the few recipes where I will get all crazy about precision! Now let’s make some bread!
Cold Day Bread
Prep Time: 15 minutes | Active Time: 30 minutes | Total Time: 8 hours | Makes: 1 loaf
Ingredients
- 500 grams (about 3 3/4 cups and 2 tablespoons) flour
- 360 grams (about 1 1/2 cups and 1 tablespoon) water, at
- 95-100 degrees*
- 10 grams (about 1 1/2 teaspoons) salt
- 2 grams (about 2 heaping tablespoons) yeast
- shortening for greasing
Directions
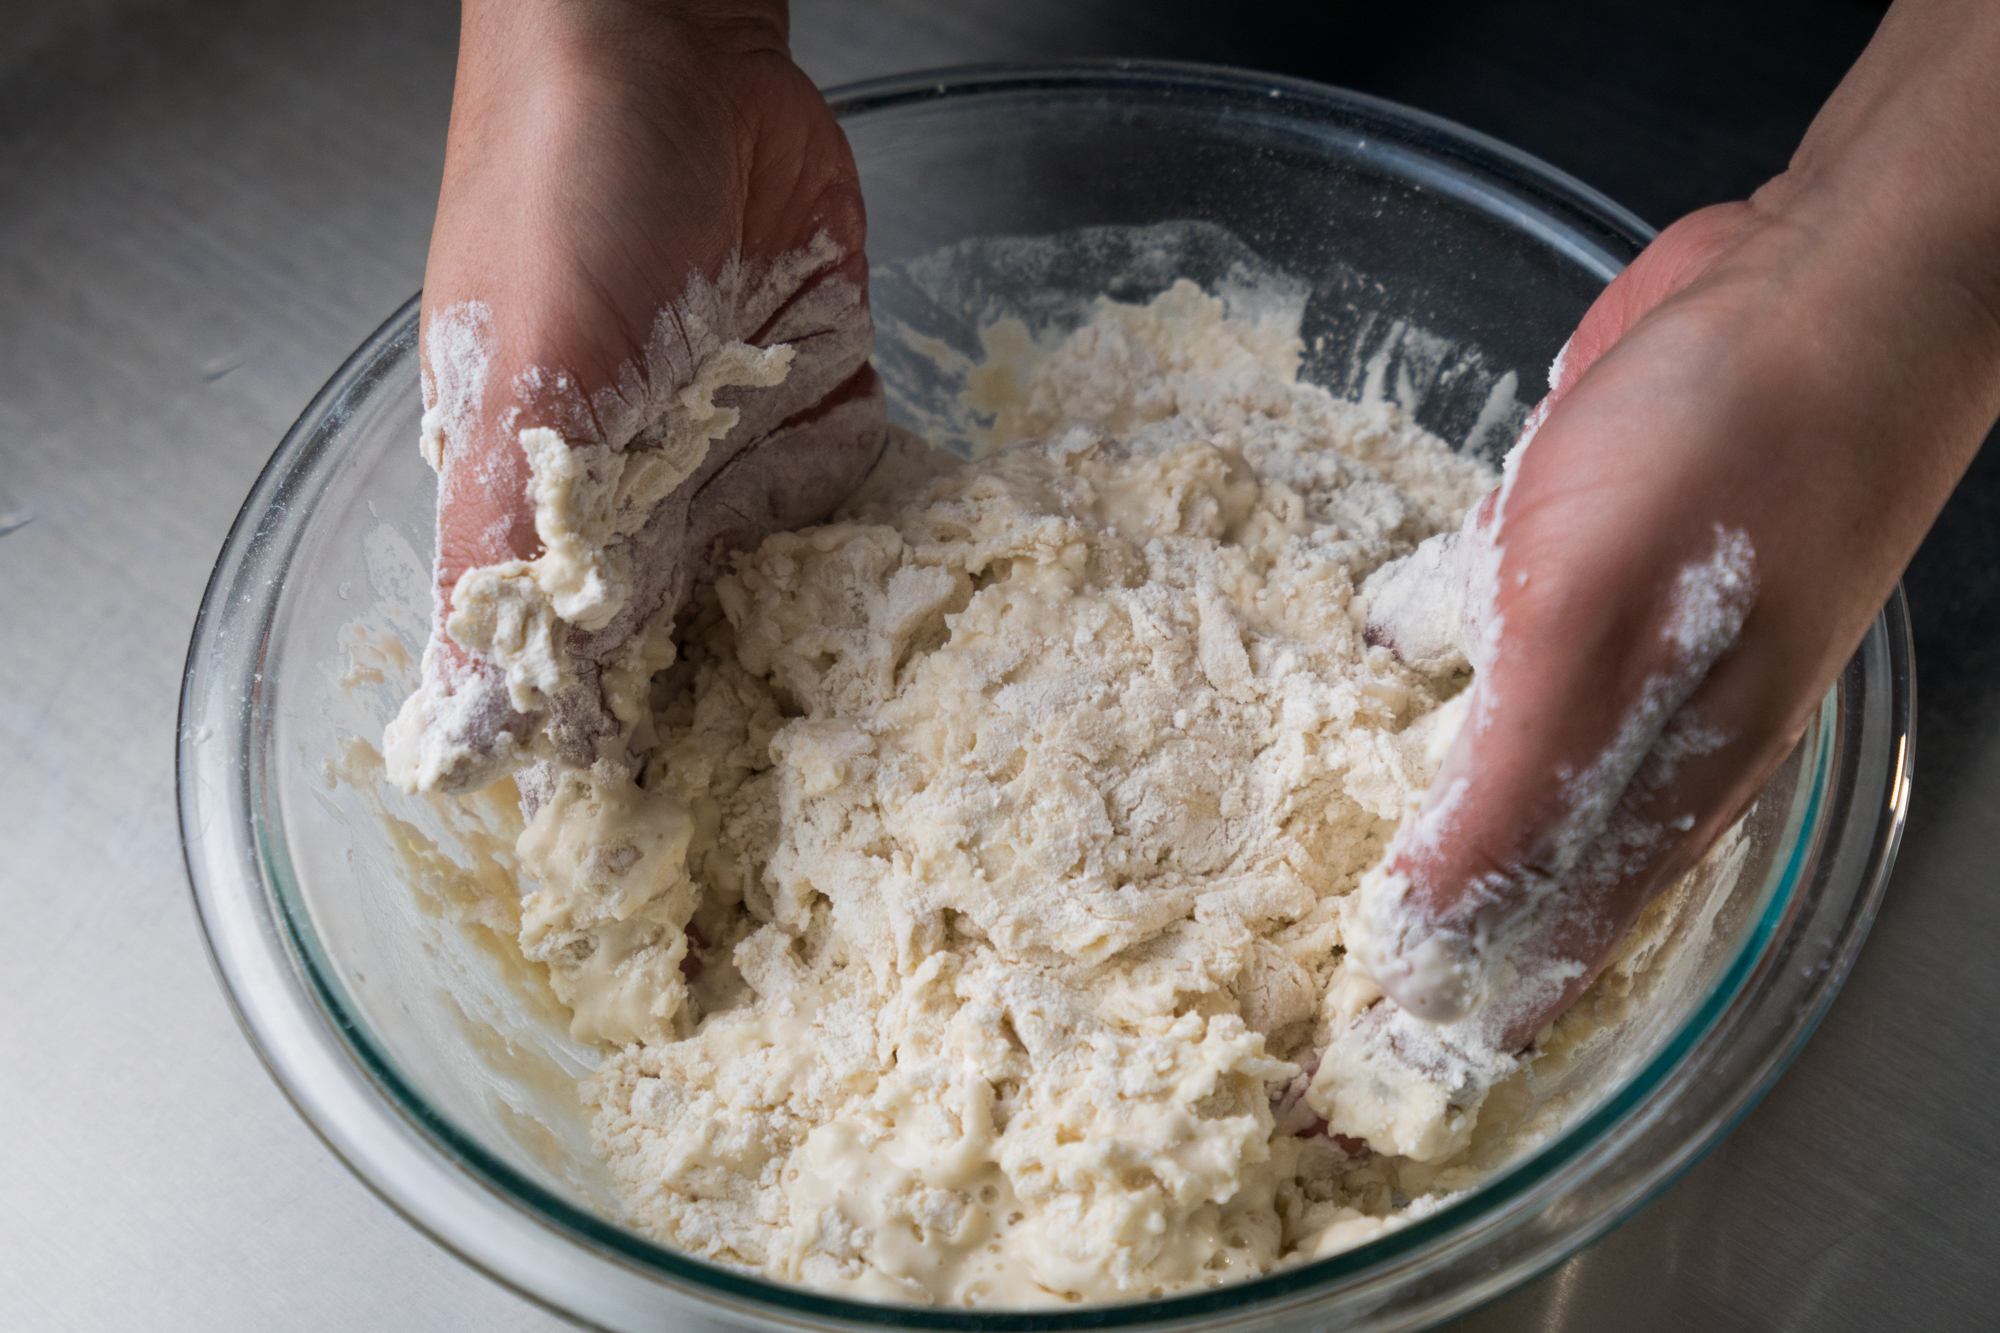
- In a very large bowl, combine flour and water. Mix well, using wet hands and don’t be afraid to re-wet hands so that the mixture does not completely stick to you (some sticking will happen). Mix until combined, cover and allow to rest for 20-30 minutes
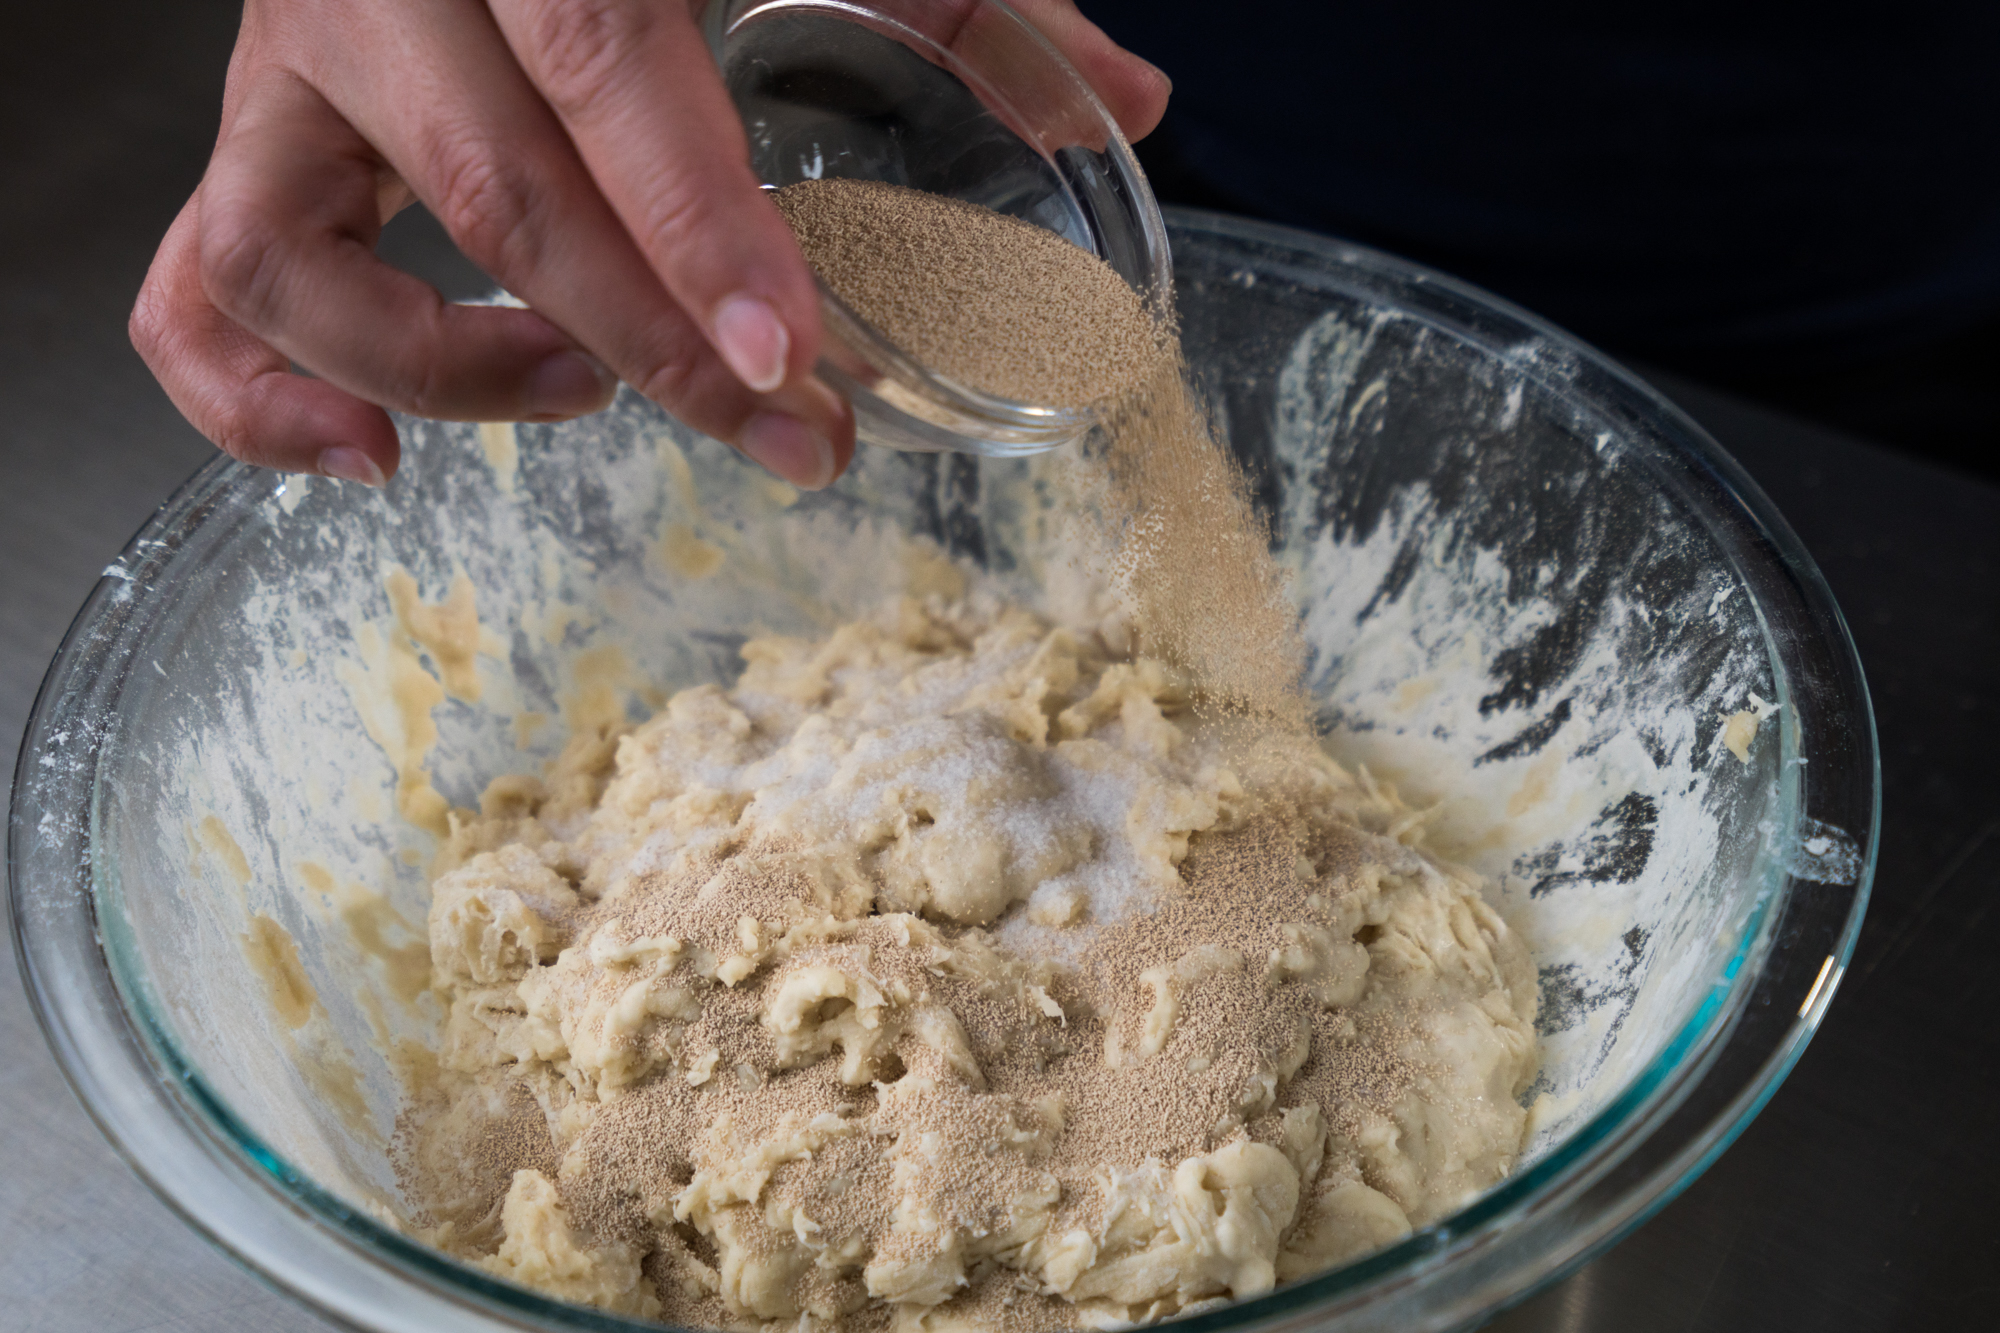
- Once dough has rested, sprinkle the yeast and salt over the top of the dough. Using wet hands again, begin to mix yeast salt into the dough, rewetting hands as necessary. When mixing, make sure to stretch and fold the dough to fully incorporate the yeast and salt. Do this for about 5 minutes or until the dough is a bit more solid and not as sticky (though it will be stickier than you think it should be, this is ok!)
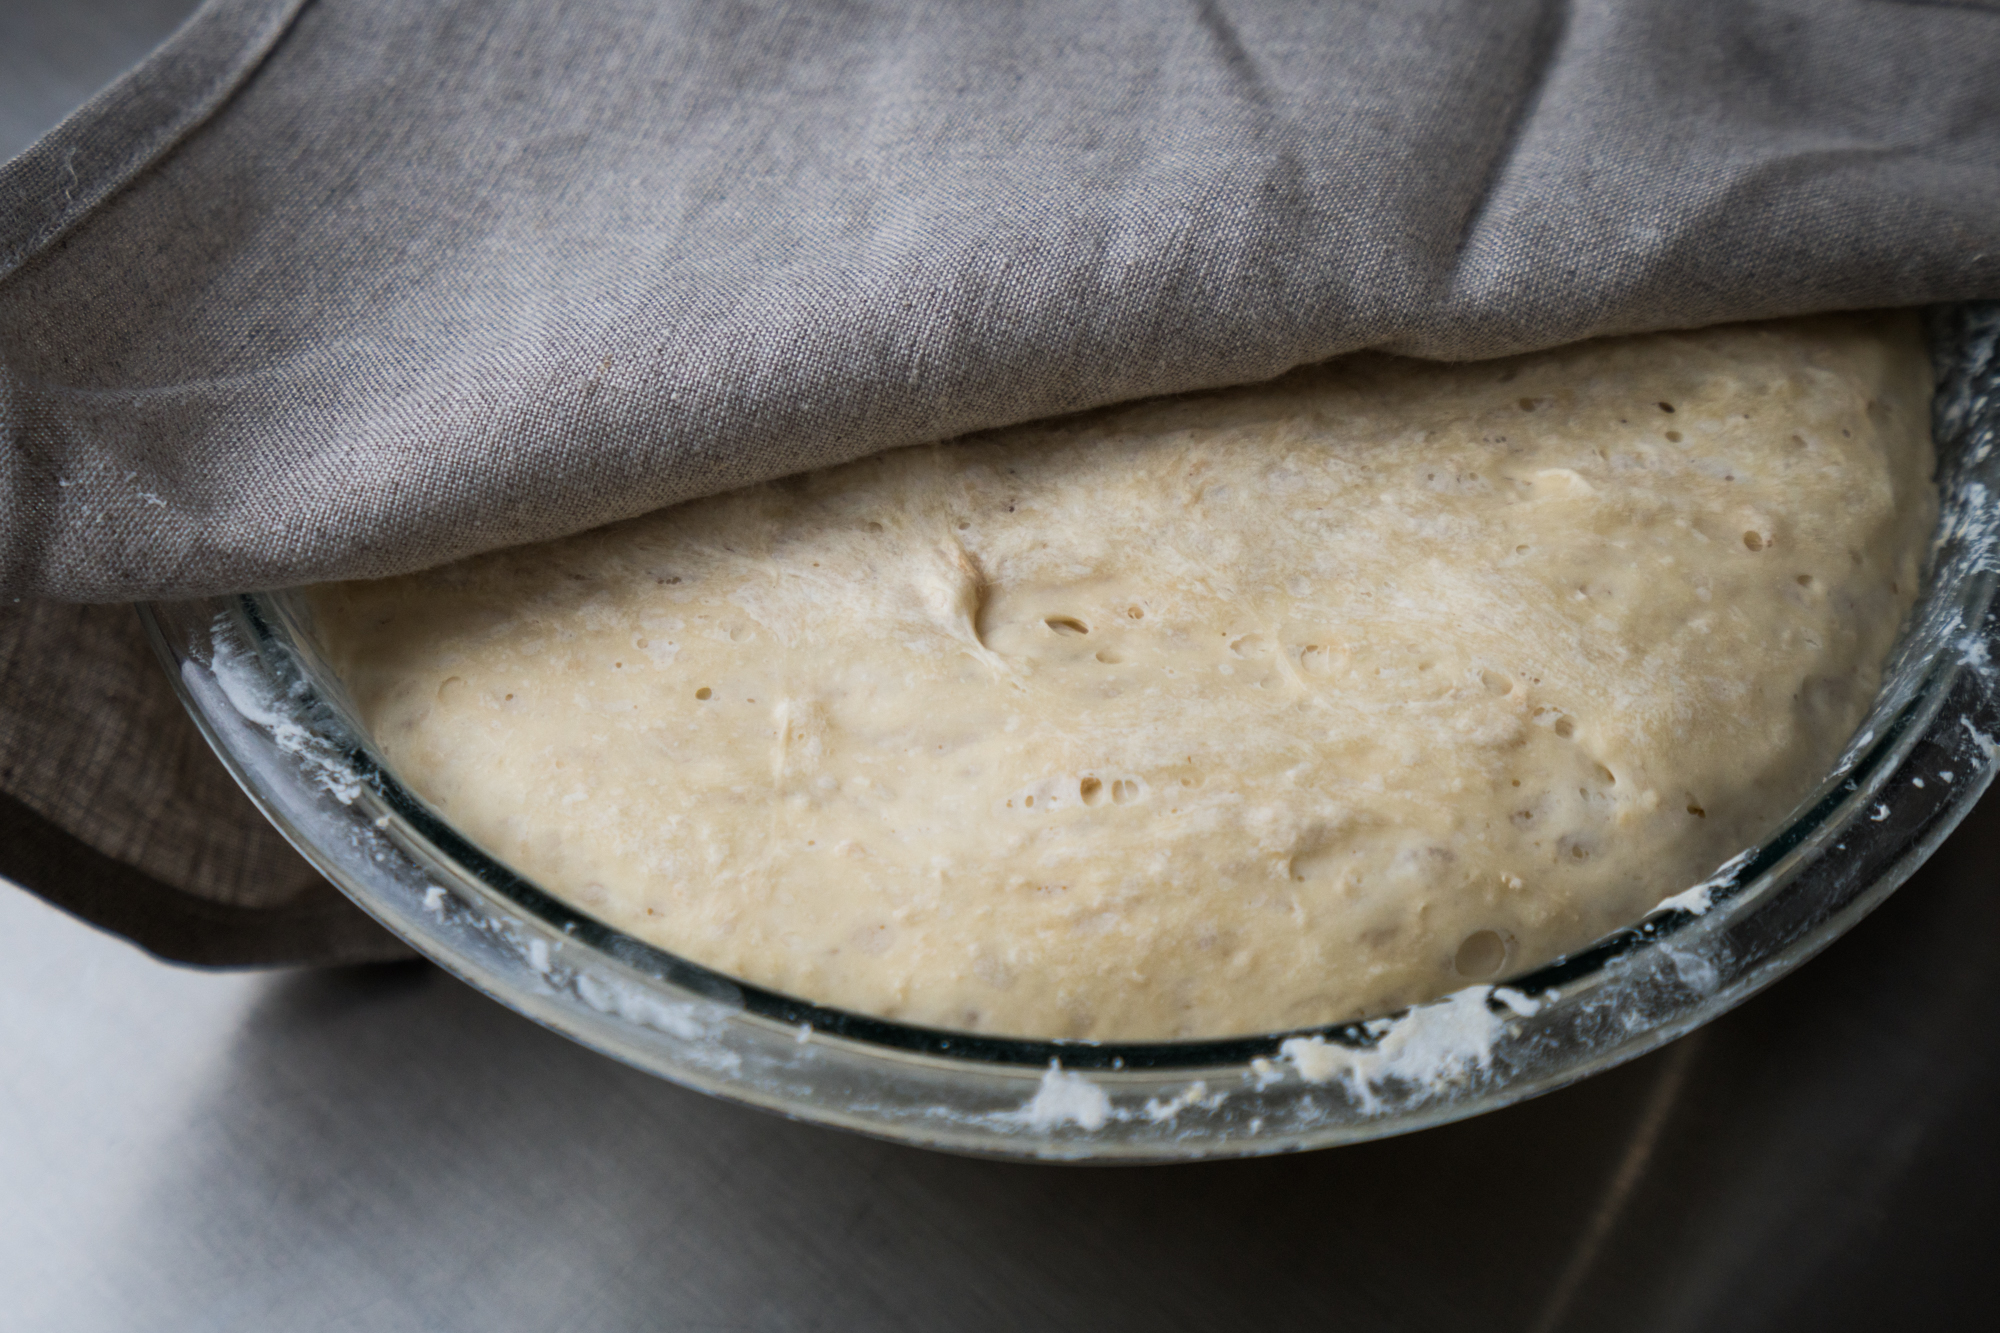
- Cover the dough and allow rest a warm place for about 10 minutes. Using wet hands again, stretch a section of the dough and fold it back on top of the dough. Do this on all sides of the dough until you have stretched and folded all dough and it is in a rough ball shape. Cover the dough and repeat this process one more time in the next hour. Once you have folded twice in an hour, allow the dough to rise in a warm place for about 5 hours
- Place a clean cotton towel in a large bowl and gently coat all over with flour. Once the dough has risen, gently punch it down and place on a lightly floured work surface. Once again, stretch and fold the dough (dry hands are ok this time), working the dough like this on all sides for about 5 minutes or until the dough begins to firm up a bit more and feels solid to the touch
- Stretch the dough one last time on each side and form a ball. Putting the seam side down (where you folded each piece you stretched), place gently in the bowl with the floured towel, cover, and allow one more rest of about an hour
- About 15 minutes after you covered the dough, adjust the racks in your oven so you can comfortably fit the Dutch oven in and preheat to 475 degrees, coat the Dutch oven with shortening and placing it in the oven with the lid on. And another great reason why this is a good cold day project the kitchen will be toasty after all this oven action
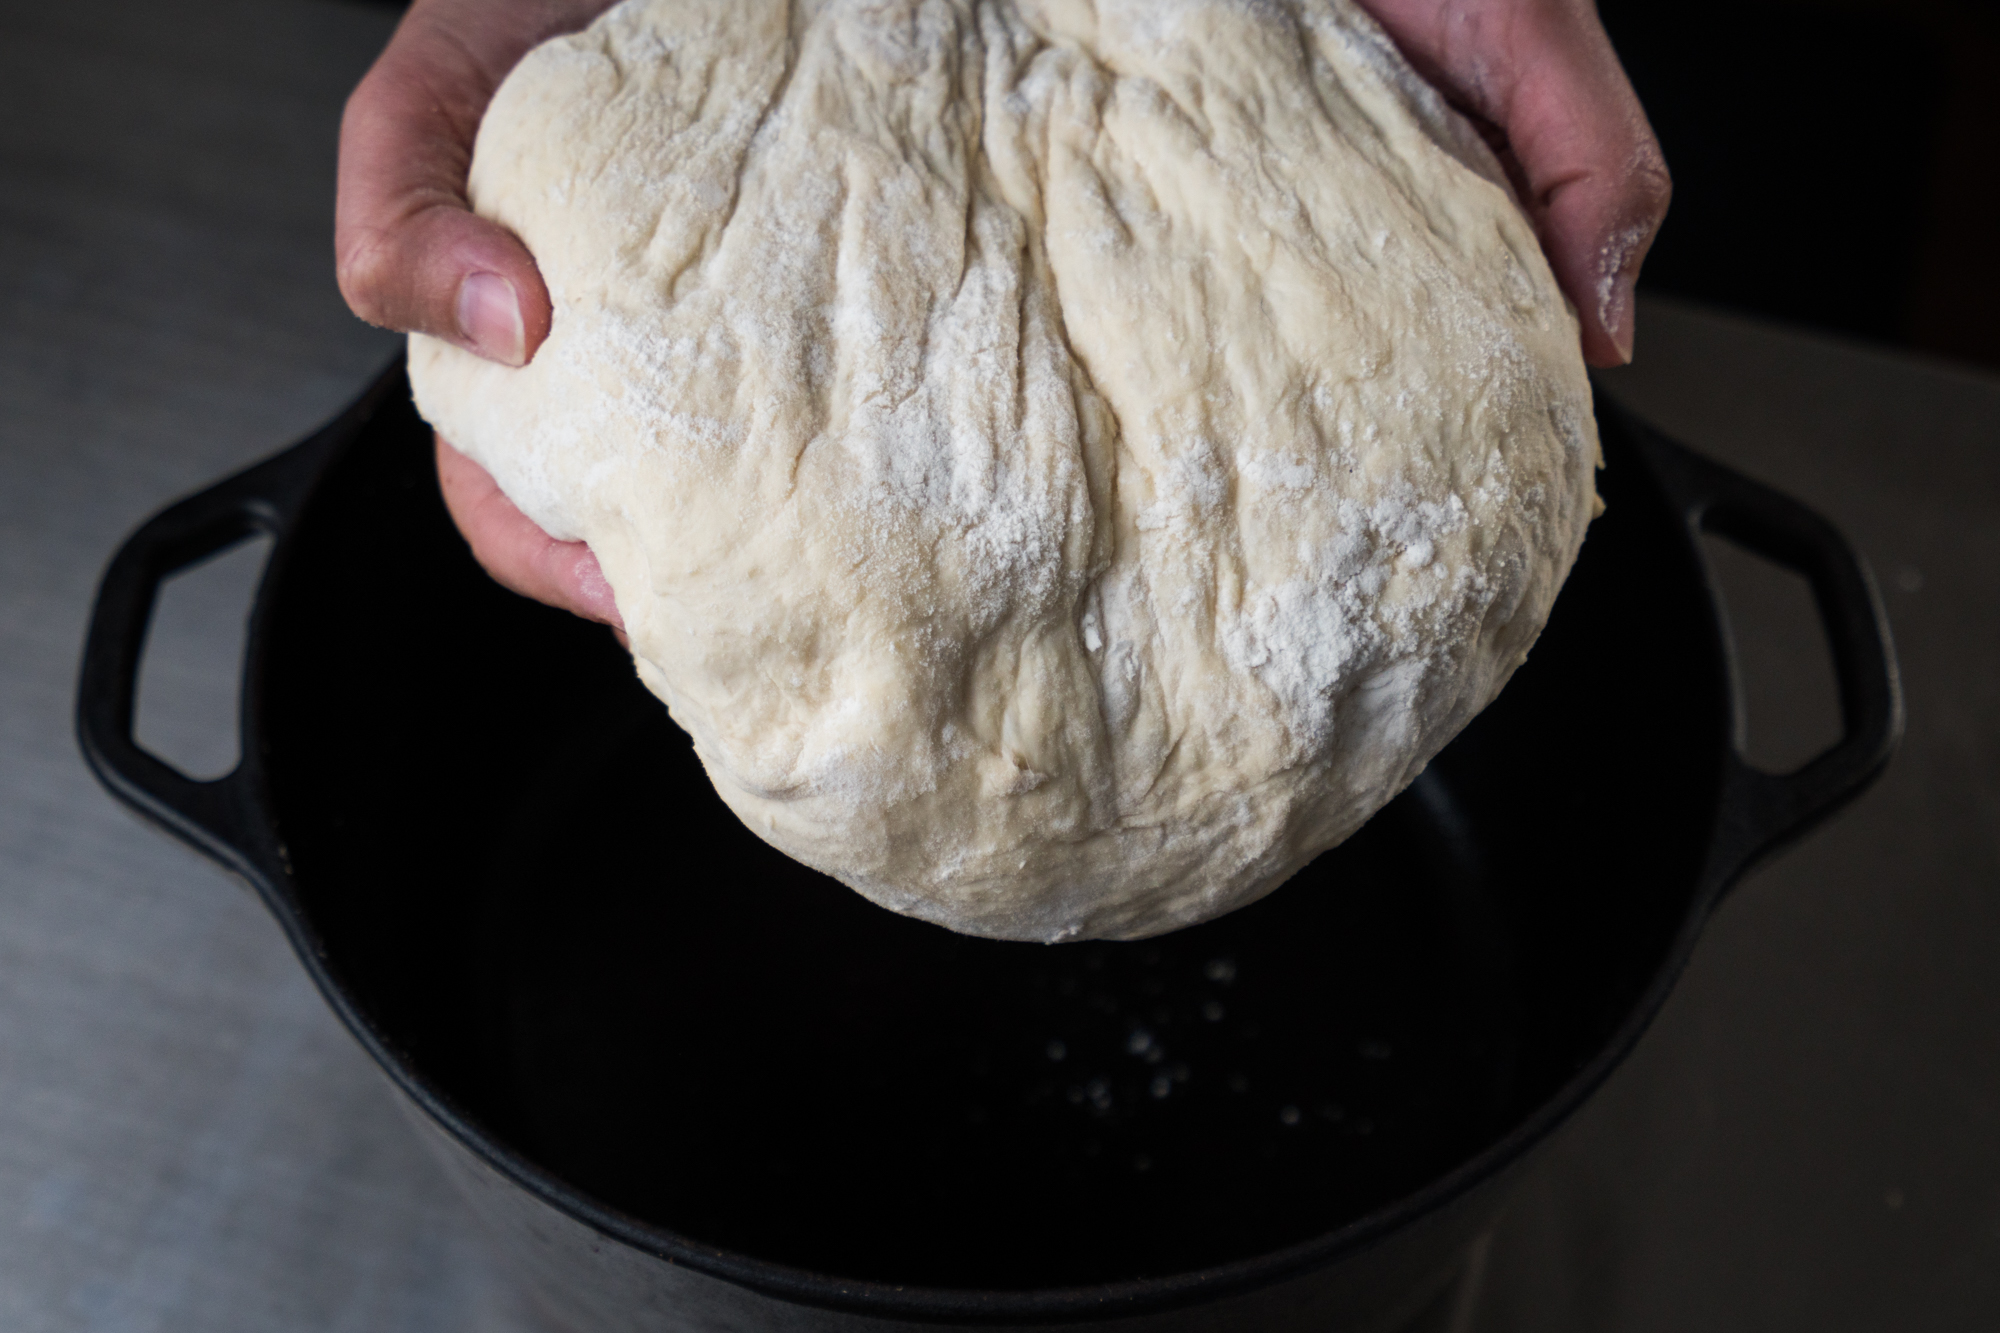
- Once the bread has risen, VERY carefully remove the Dutch oven from the oven and CAREFULLY place the bread inside the Dutch oven seam side up (meaning the part that was on the bottom of the resting bowl is now the top). Place lid back on and bake in the oven for 30 minutes
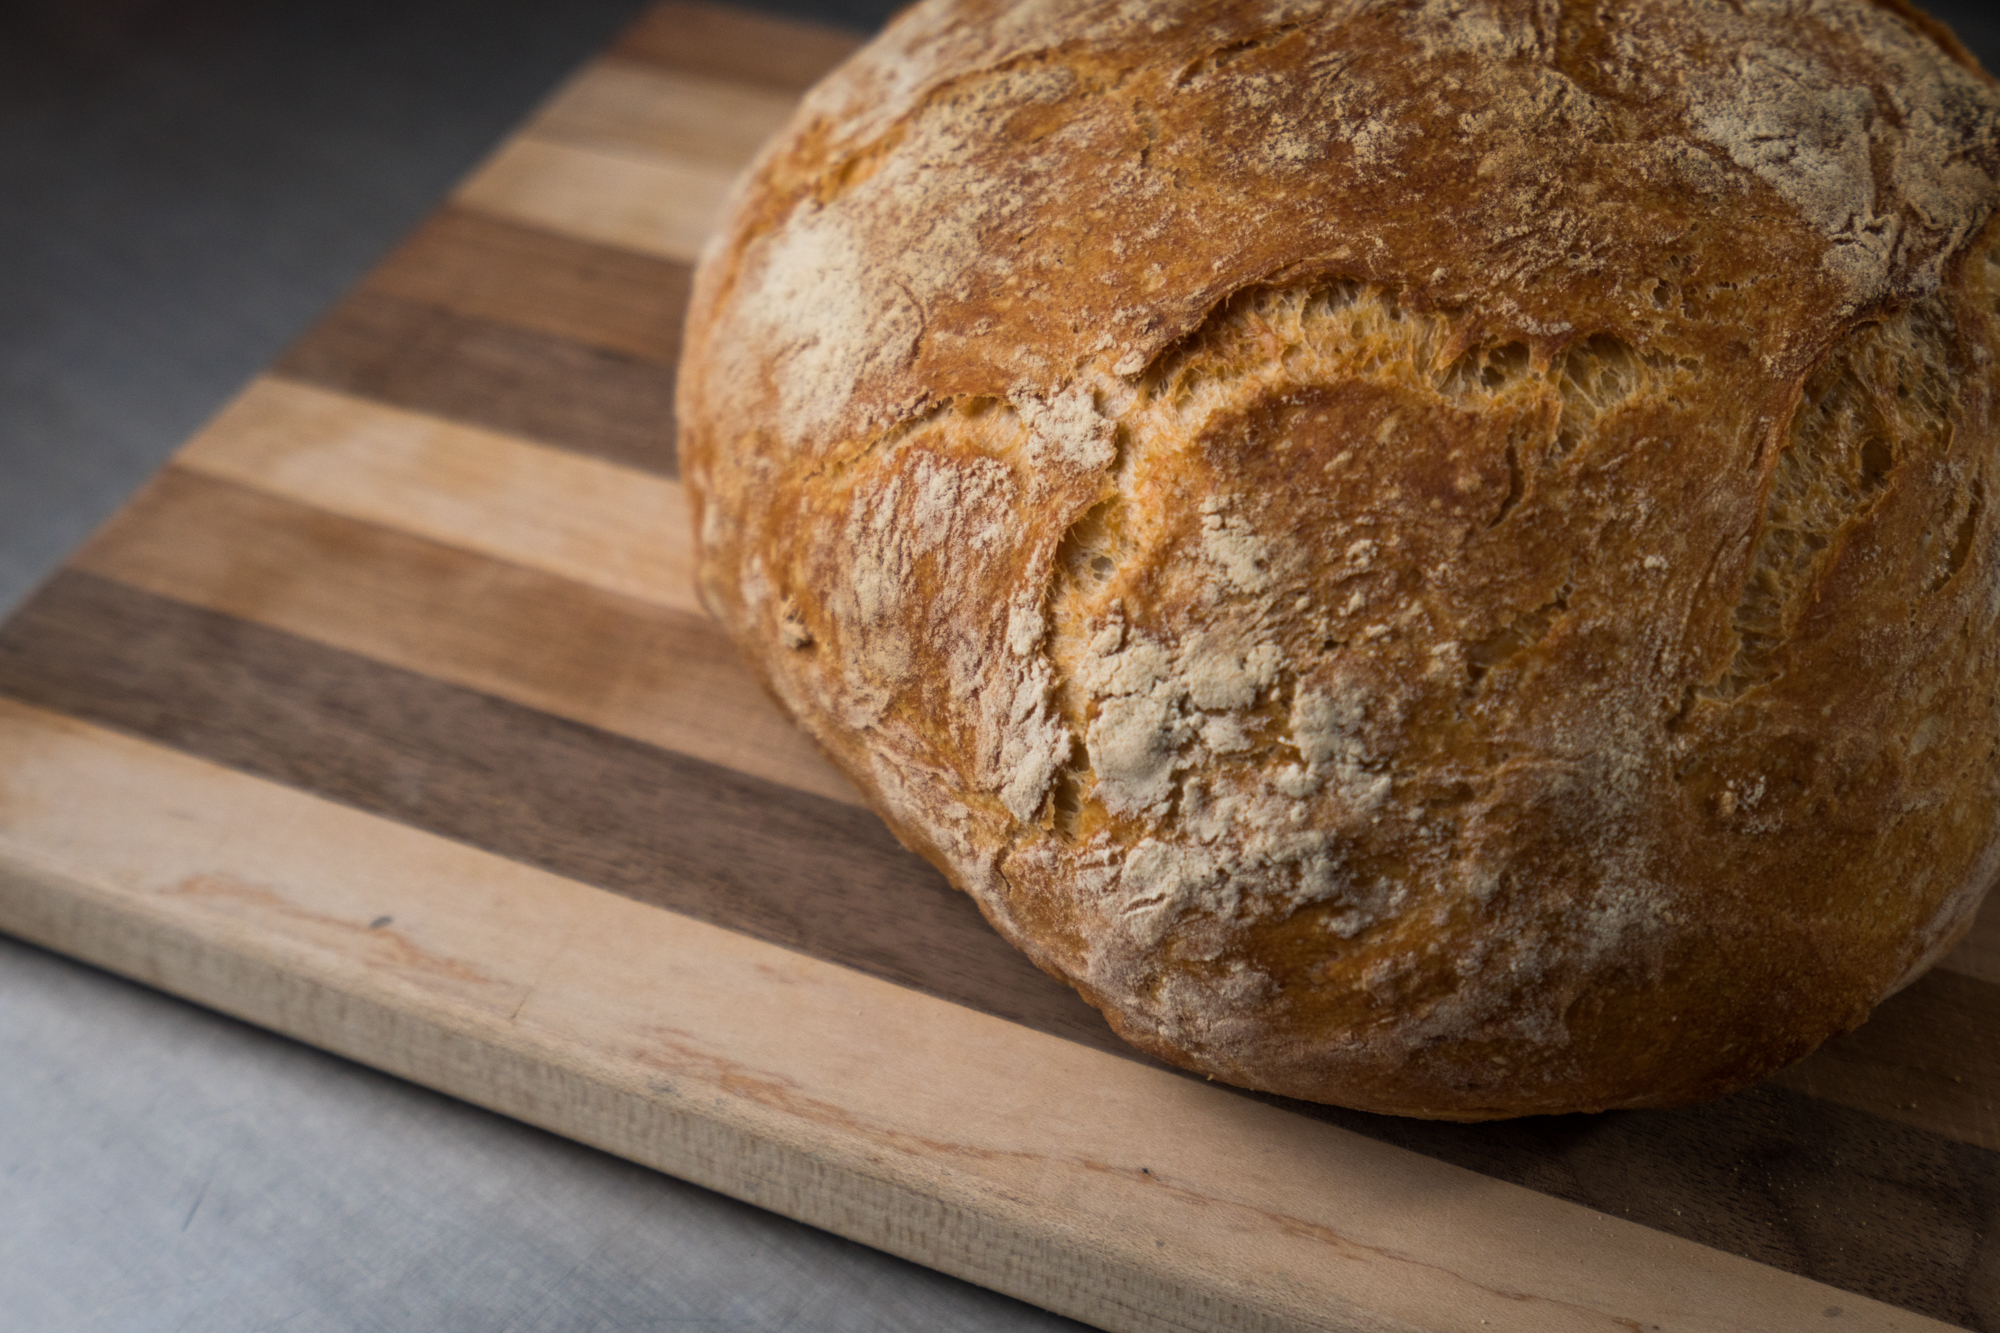
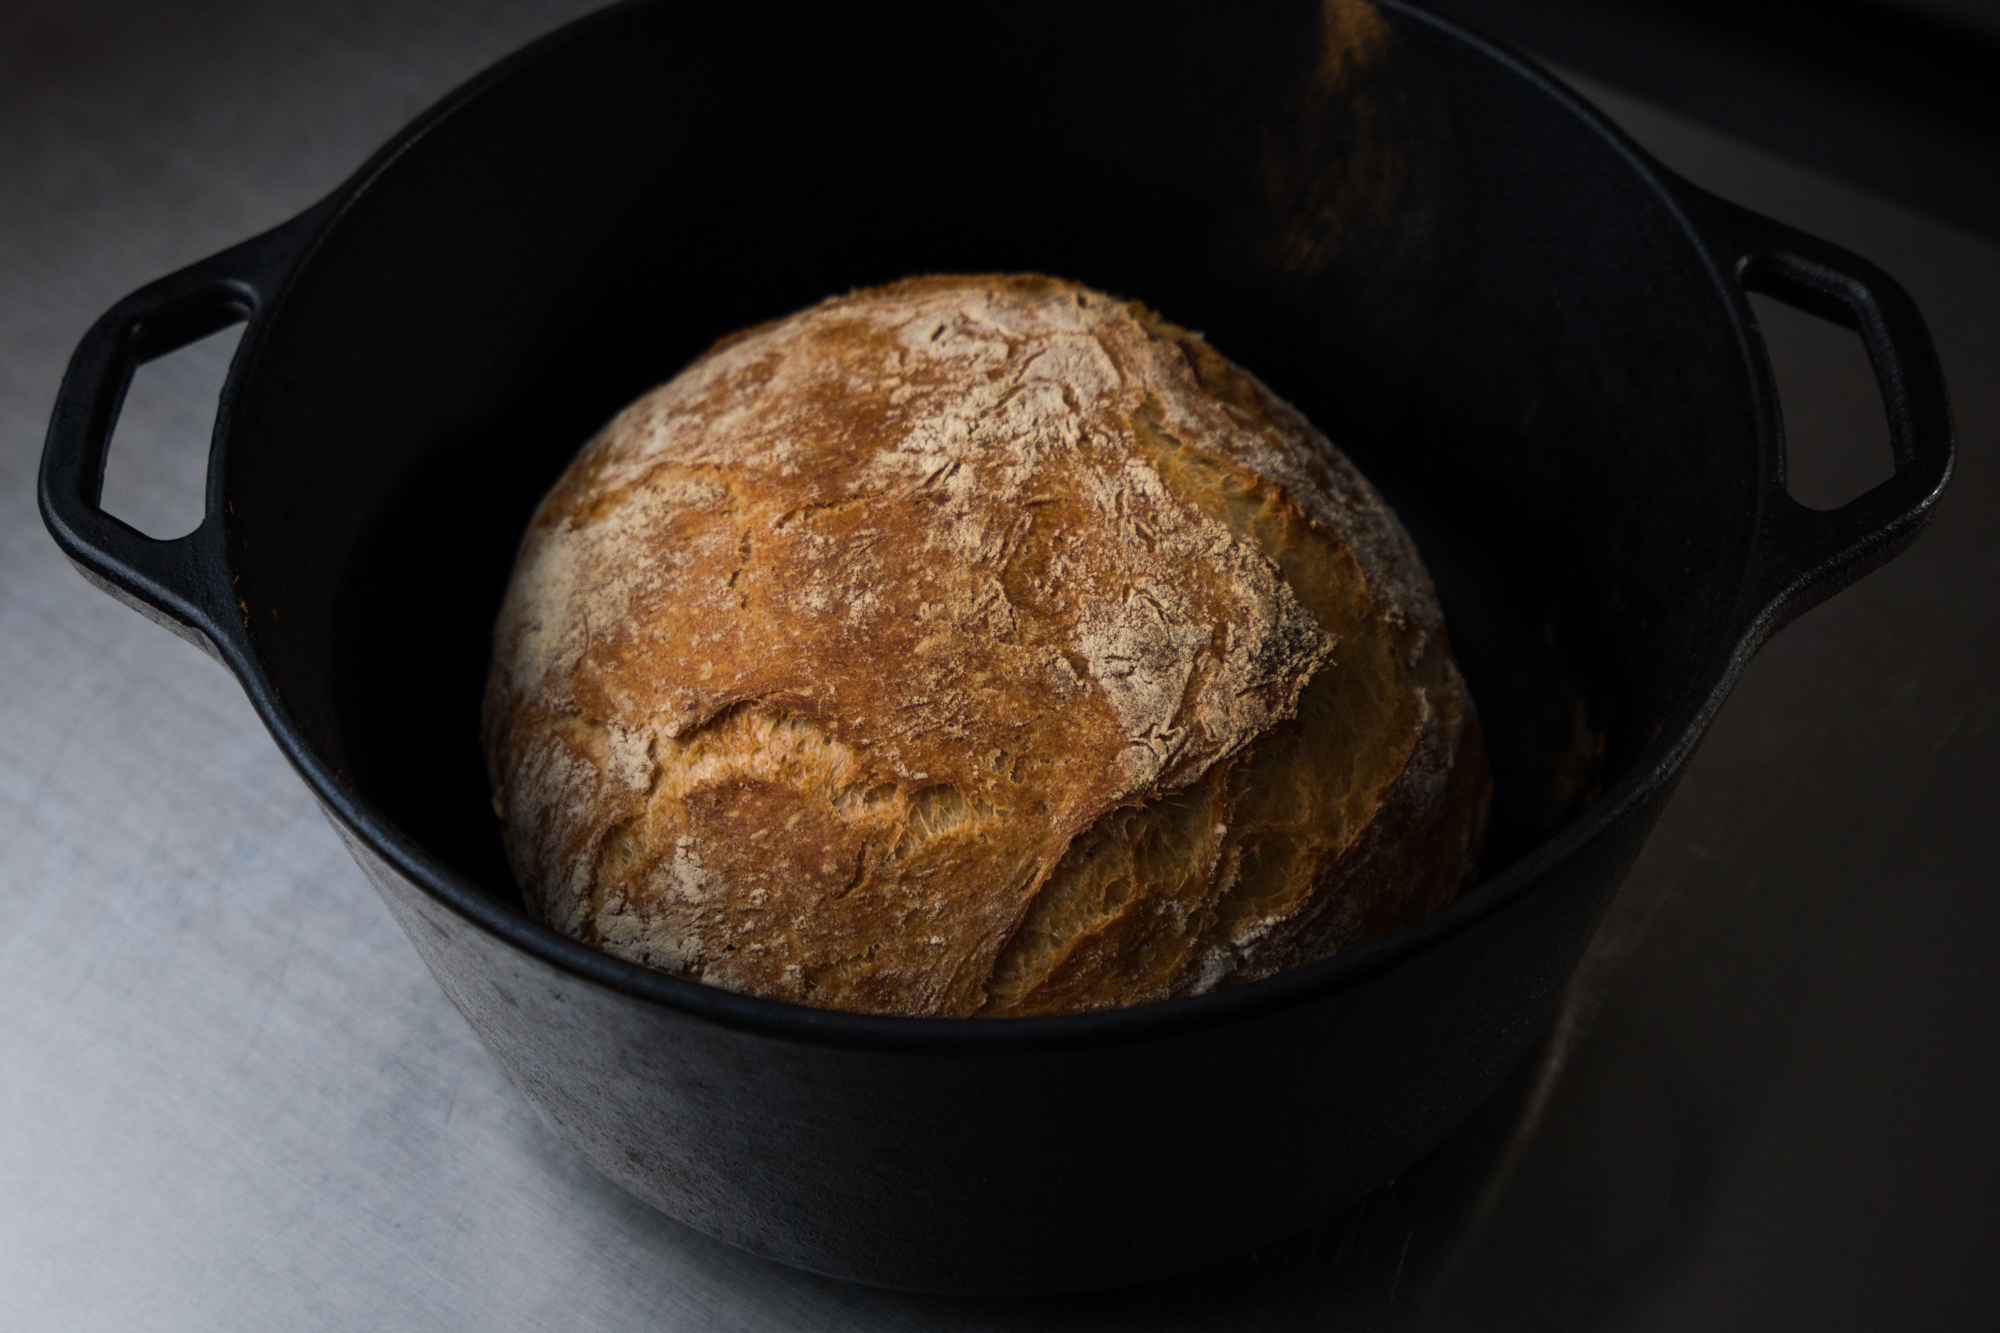
- Again, VERY CAREFULLY remove the lid and bake for an additional 20 minutes or until the top is looking very golden and almost brown
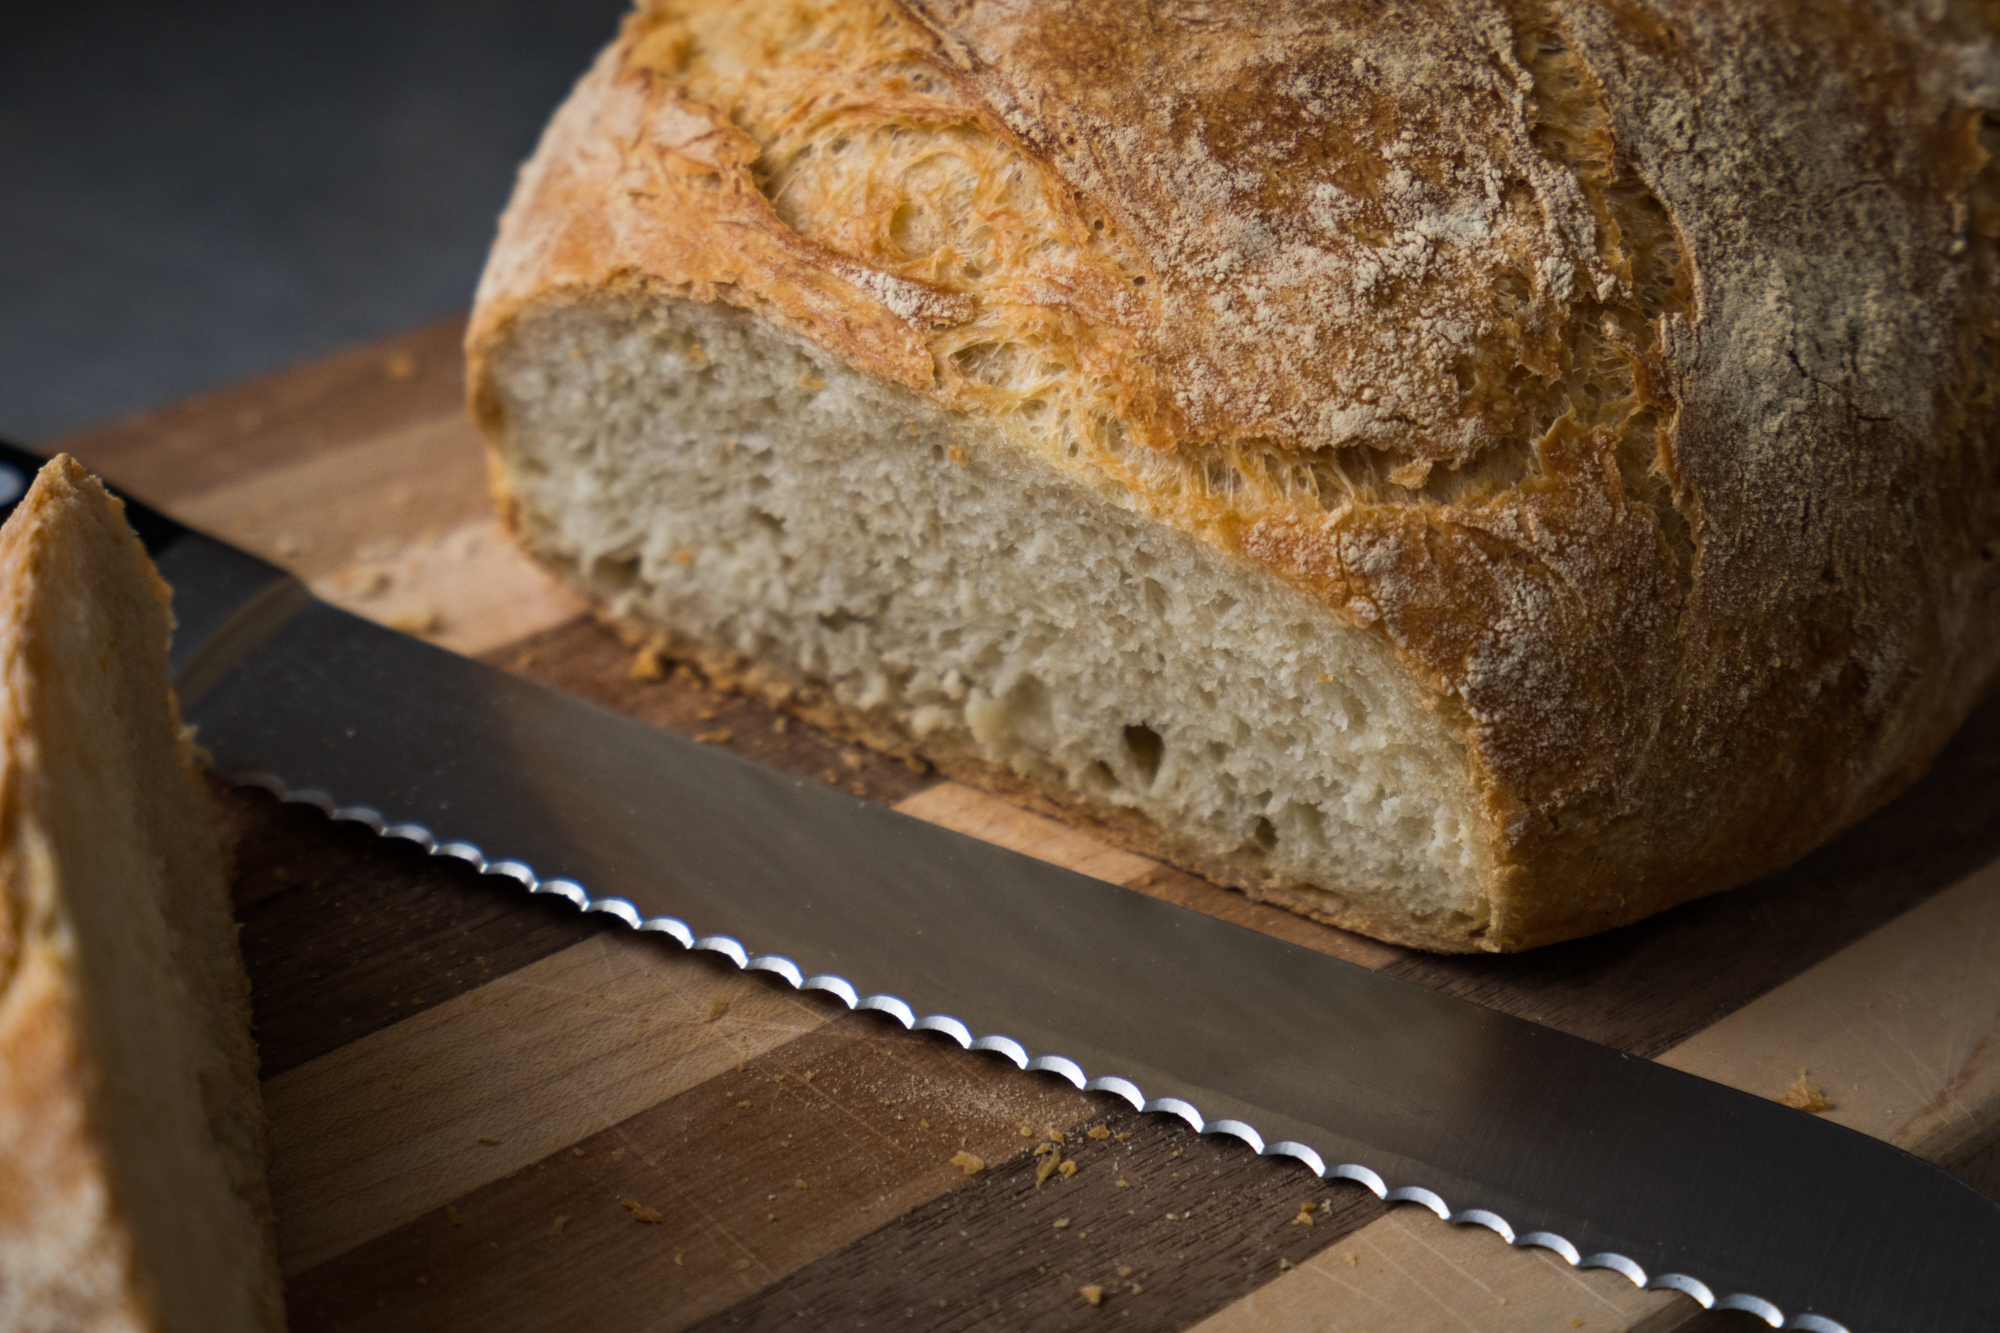
- Once done, remove from oven and CAREFULLY tilt Dutch oven and turn loaf out onto a wire rack or cutting board and allow to cool for at least 20 minutes. If you place the bread on a cutting board, make sure to put it on it’s side so the air can circulate around the bottom
- Before you slice, make sure you listen. You will hear a distinct crackle from your bread as it cools down. This sound is so cool and lets you know that bread is just about ready. Now slice and enjoy a little bit of bread heaven!
Tips
- I will generally microwave the water for about 1minute 15 seconds to obtain the ideal temperature for the bread and will test the temp with a kitchen thermometer. If you do not have a thermometer, the water should be very warm to the touch but not burn. If it burns, it’s too hot and will kill your yeast. Don’t do that!
- It’s not a bad idea to have a small bowl with tepid water next to you when you are hand mixing the dough. My kitchen is set up so my workspace is right next to the sink and I can quickly rewet my hands that way, but it may be easier for most to have the water right there
- The one downside to Cold Day Bread is that making it on a cold day can be a challenge from a rising standpoint. The bread will not go if your house is too cold so I recommend either finding a warm and sunny spot in your house that can let it rise in or try this trick I’ve learned. Preheat the oven to 350, but only allow the oven to be on for maybe 3-4 minutes. Wait about 2-3 minutes, then place your bowl of dough in the oven and allow it rise there. The few minutes of heating allow the oven to warm up a bit and most ovens hold heat pretty well. Since this has a pretty long rise time, make sure you check in on the oven from time to time and if it gets too cold, preheat the oven again at 350 for 3-4 minutes and keep the oven door ajar so it gets some heat but not too much.