Basic French Bread

We are bread people. We will eat it in many forms, but there is truly something special about a fresh, hot loaf of bread made with your own hands. One of our favorite ways to enjoy fresh bread is a French loaf begging to be dipped in oil or slathered in butter.
For a number of years, our table bread fix came courtesy of the local grocery store’s bakery. My fiancé had made loaves of bread in the past that tasted wonderful, but between full time work, poor meal planning and a lack of interest from me, bread made with our own hands didn't happen much. If I'm being honest, my lack of interest was more my fear of making bread from scratch. I had long ago written that off as "too hard". Once we began to really look at what we ate, how we planned to cook and how we actually cooked, I realized that “too hard” was not a good enough reason to not try my hand at bread.
I researched online and flipped through cookbooks until I came upon the Betty Crocker website and found their take on French Bread. It was written in a way that was not intimidating and appeared to be actually something I could do. The ingredient list was short (as most breads are which I did not know at the time) so I gave it a try. And boy am I glad I did! Not much in this world can beat a fresh, hot loaf of bread pulled out of your oven. And to think, just a few short hours ago this beautiful bread was just ingredients!
If the taste does not make you jump on board, the fact that it makes two loaves that freeze perfectly just might. Thanks to this multi-loaf recipe, we have enjoyed fresh baked bread on nights when dinner barely made it to the table.
I like to think of this recipe as Intro to Homemade Bread. It gives you a good idea of the time involoved in bread making but is not so overwhelming and difficult that you give up before you begin. It is also a pretty forgiving recipe so even if the bread does not fold or shape perfectly, it will still taste amazing. So clear your calendar and give this bread a go. I promise you will not be sorry.
Basic French Bread
Makes 2 loaves | Prep Time: 20 mins | Rise Time: 3 hours in total | Cook Time: 25-30 mins
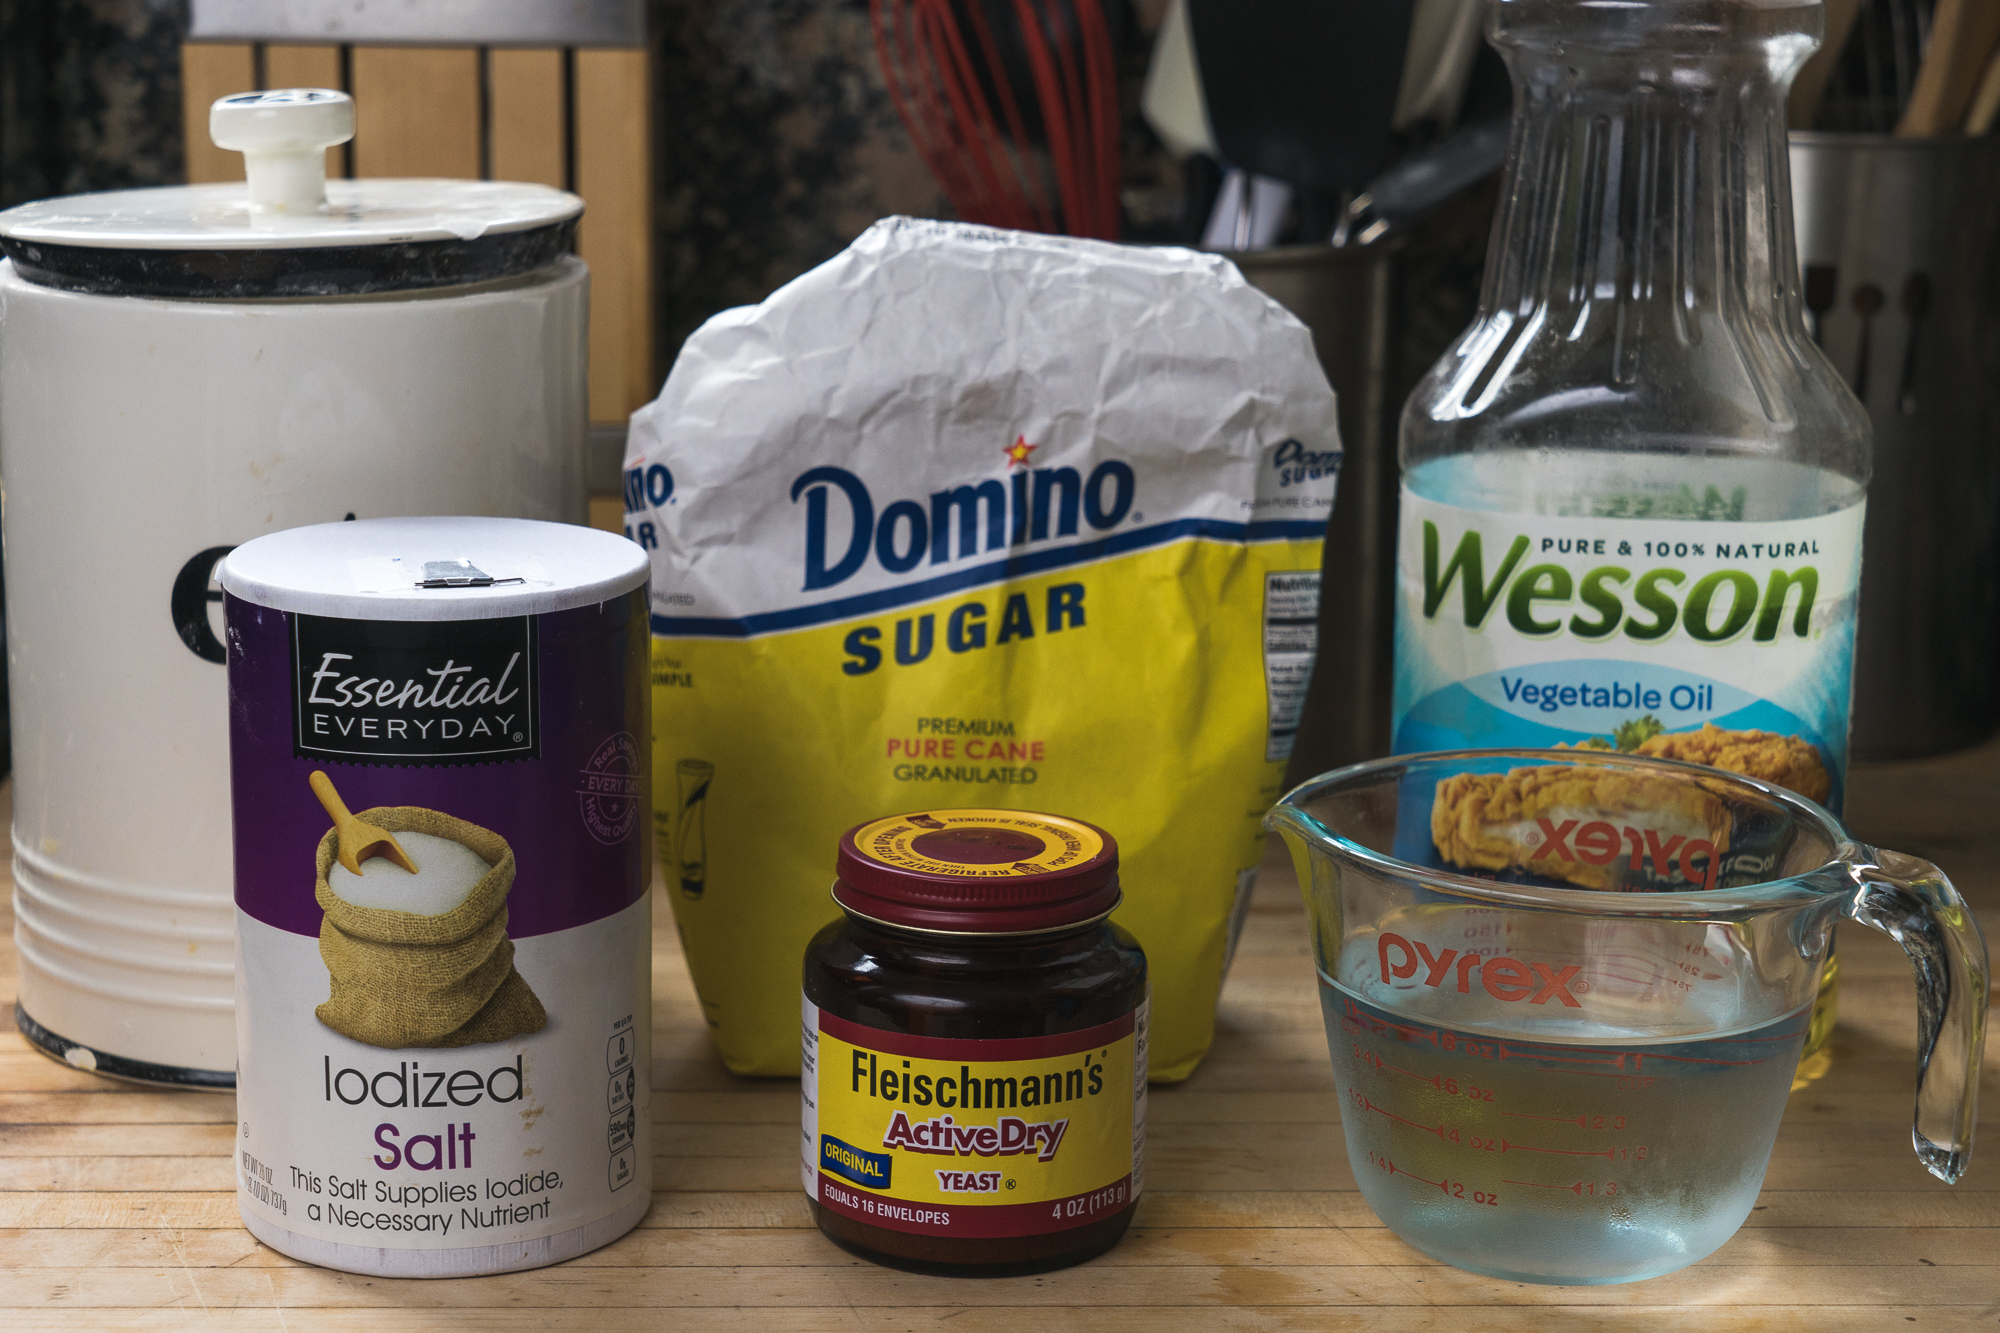
Ingredients
- 2 1/2-3 cups all purpose flour
- 1 packet or 2 1/4 teaspoon regular or quick active yeast
- 1 teaspoon salt
- 1 tablespoon sugar
- 3 tablespoons vegetable oil
- 1 cup warm water (120-130 degrees F)
- Vegetable shorting
Directions
- Generously grease the inside of a medium sized mixing bowl with vegetable shortening
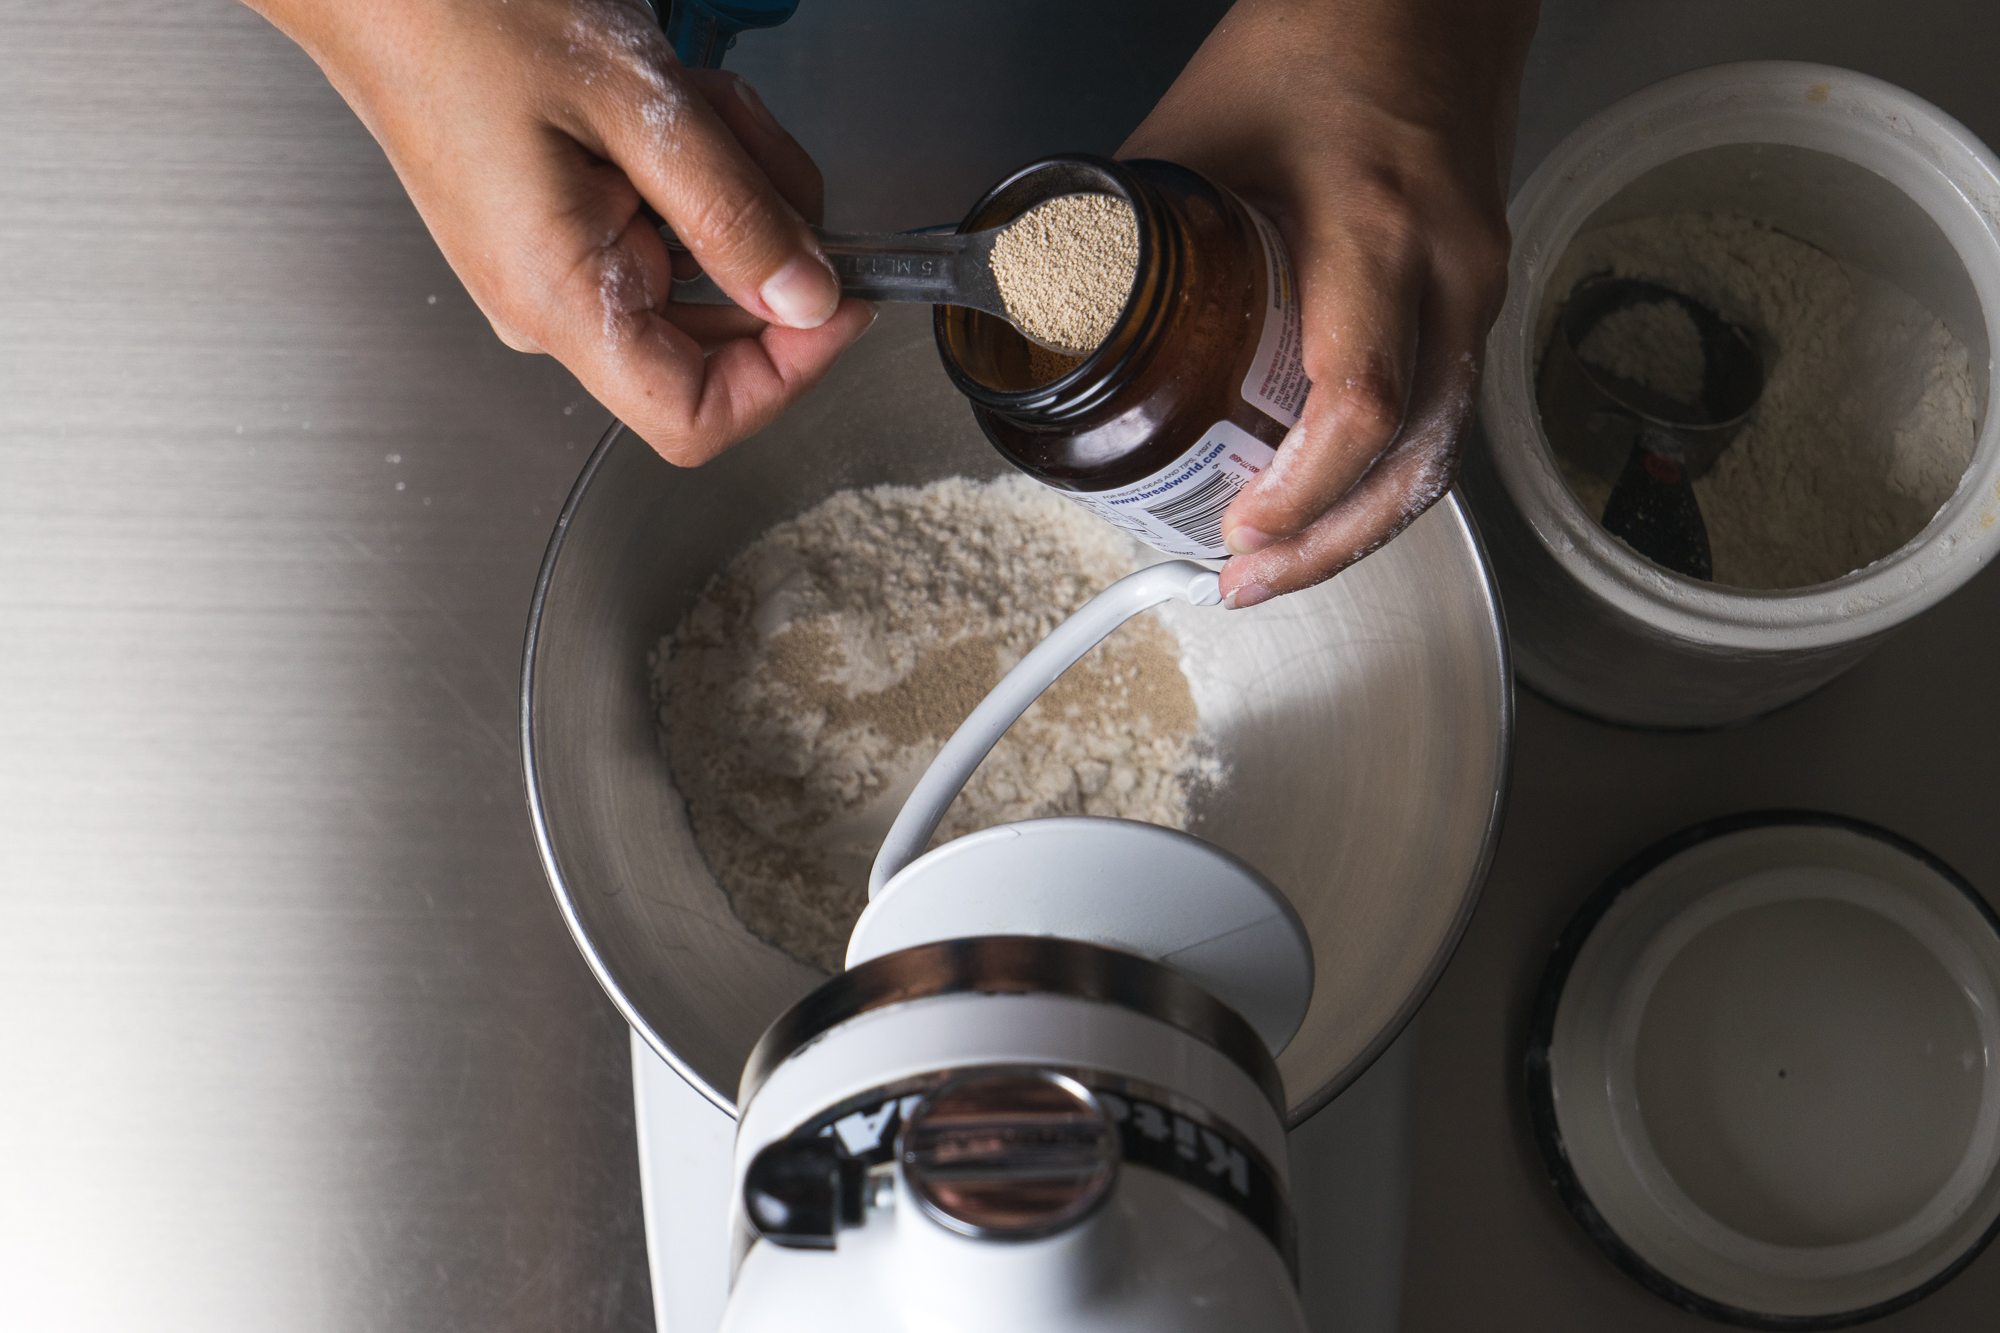
- Add 1 cup of flour, sugar, salt and yeast to a medium mixing bowl or bowl in stand mixer
- Heat water in a kettle on the stove or warm in the microwave until it is about 120 degrees. When you are first making bread, I do recommend using a thermometer to test the water temperature. If you do not have one, test the water with the tip of your finger. If it is warm but not burning your finger, you are in the range of 120.
- Slowly add the water and vegetable oil to the bowl and mix well to combine
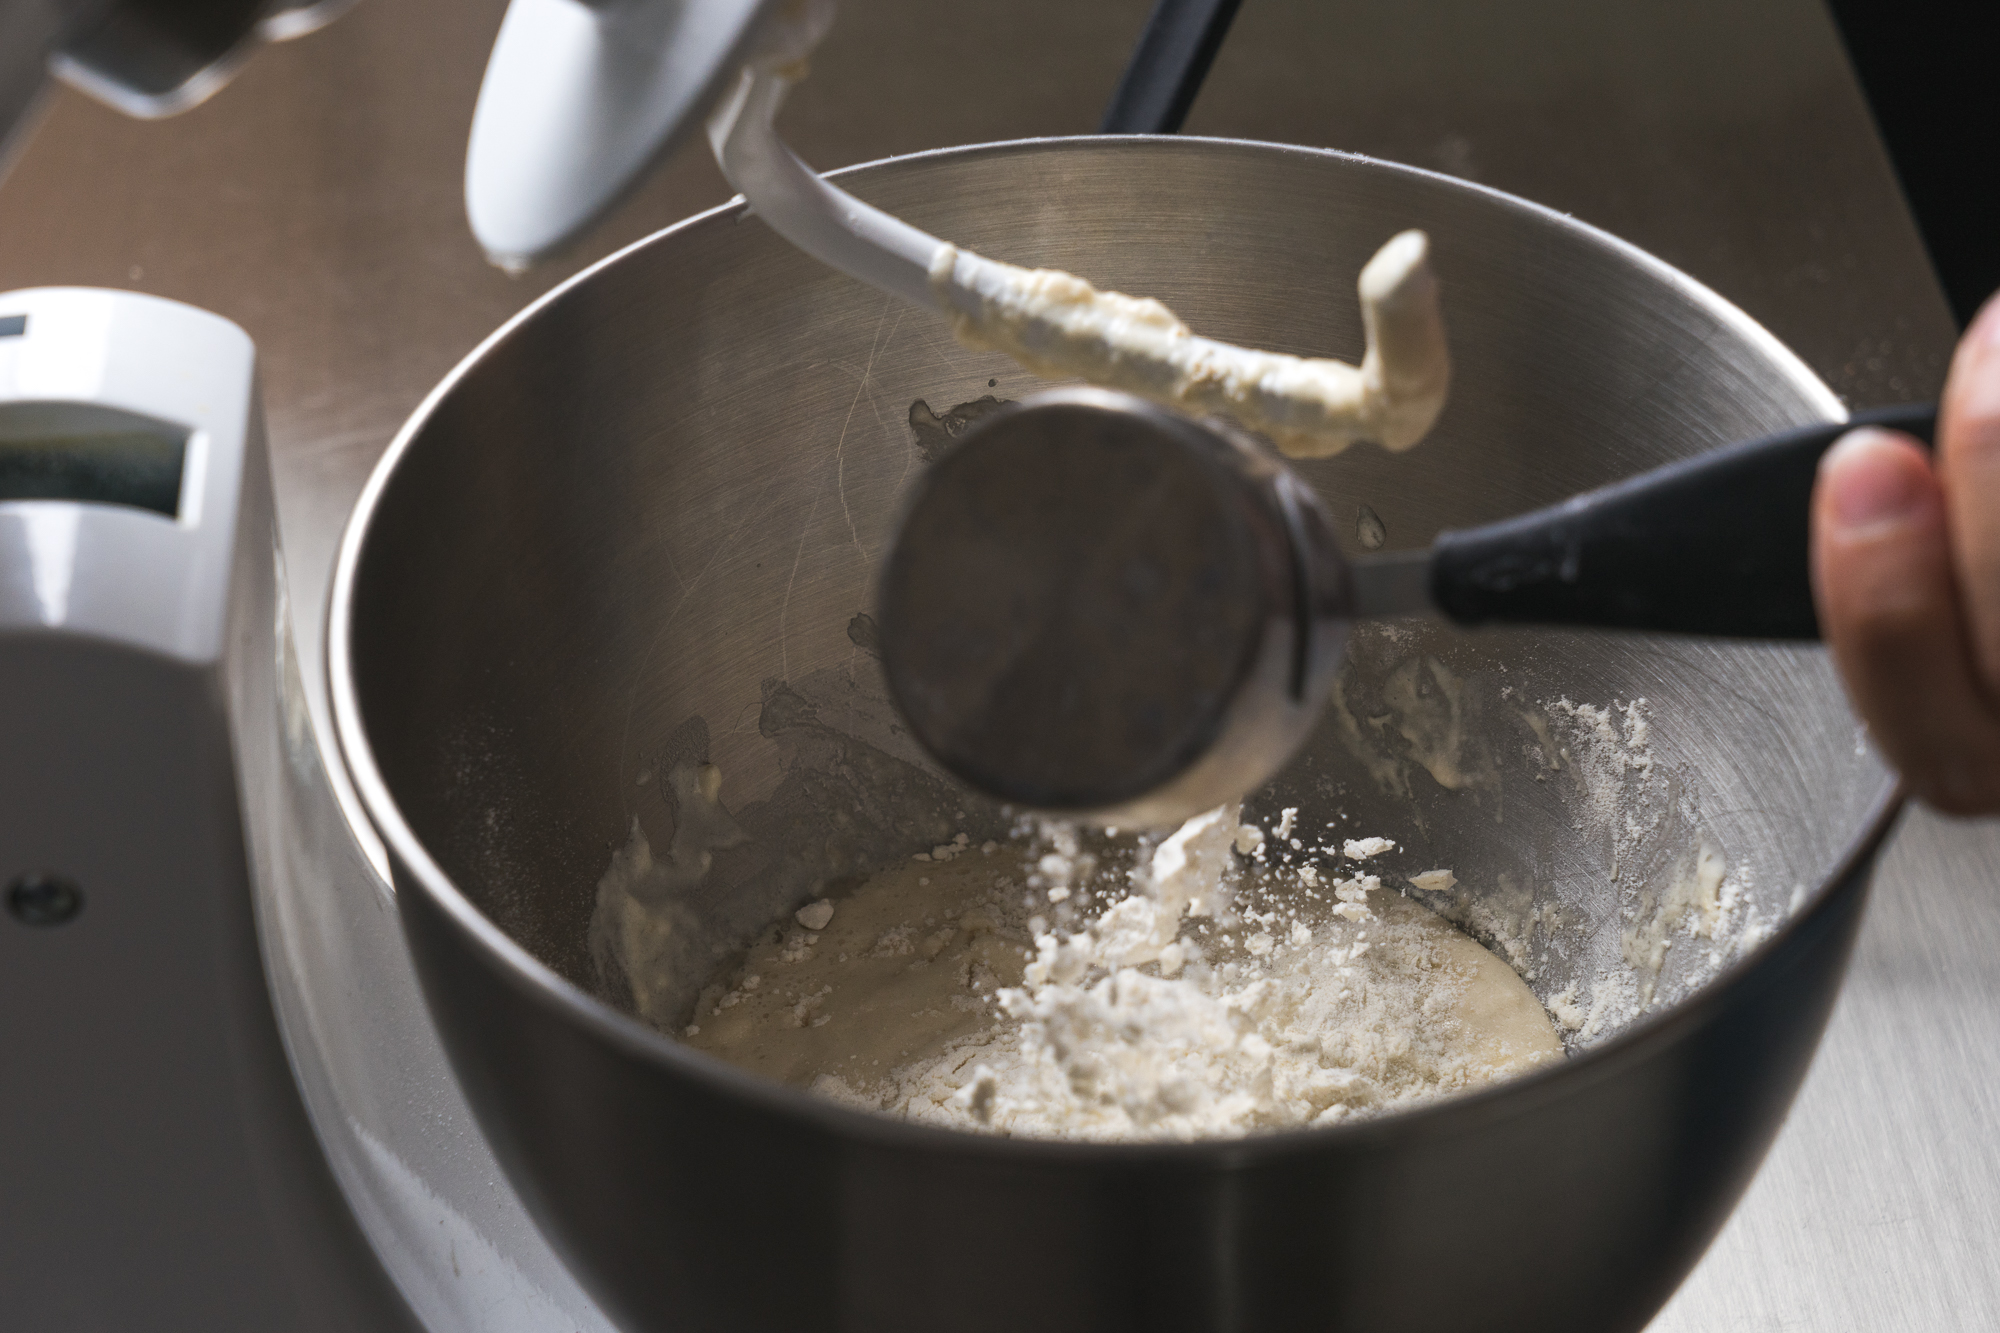
- In 1-2 minute intervals,add 1/2 cup flour and mix until dough has absorbed the flour, scraping the sides before adding any additional flour
- You have added enough flour when if you touch it, it is soft to the touch and not overly sticky and does not stick to the sides of the bowl or spoon
- Lightly flour a work surface or add a bit of flour to the top of the dough in the mixing bowl (to avoid messes I knead my dough in the mixing bowl it is in but please knead as you are comfortable) and knead dough for 3-5 minutes until the dough feels soft and springy to the touch. Feel free to add a tablespoon of flour at a time if the dough is sticking to you or your work surface
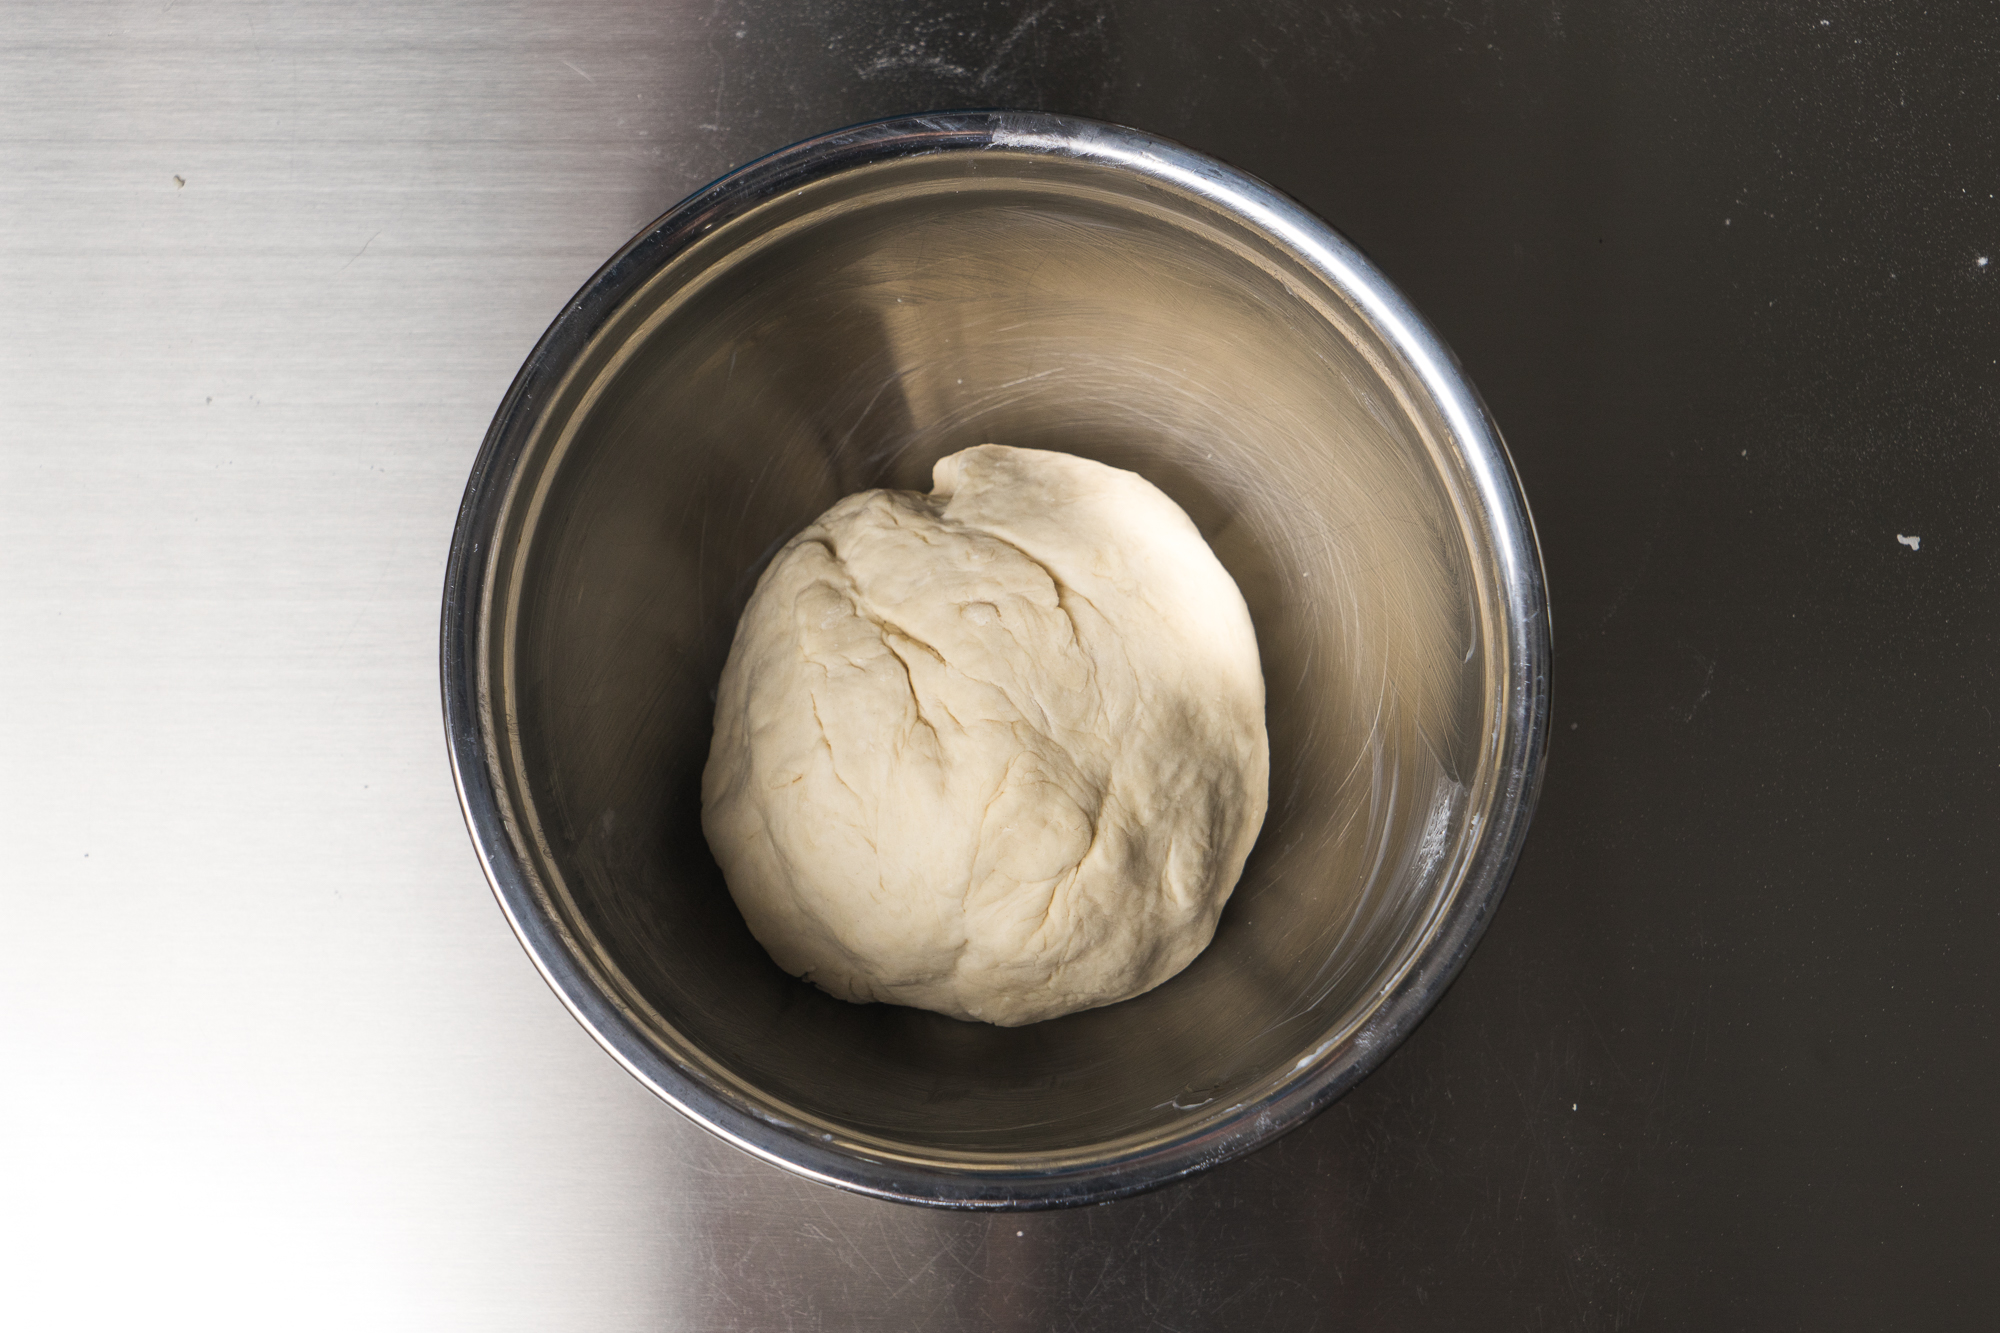
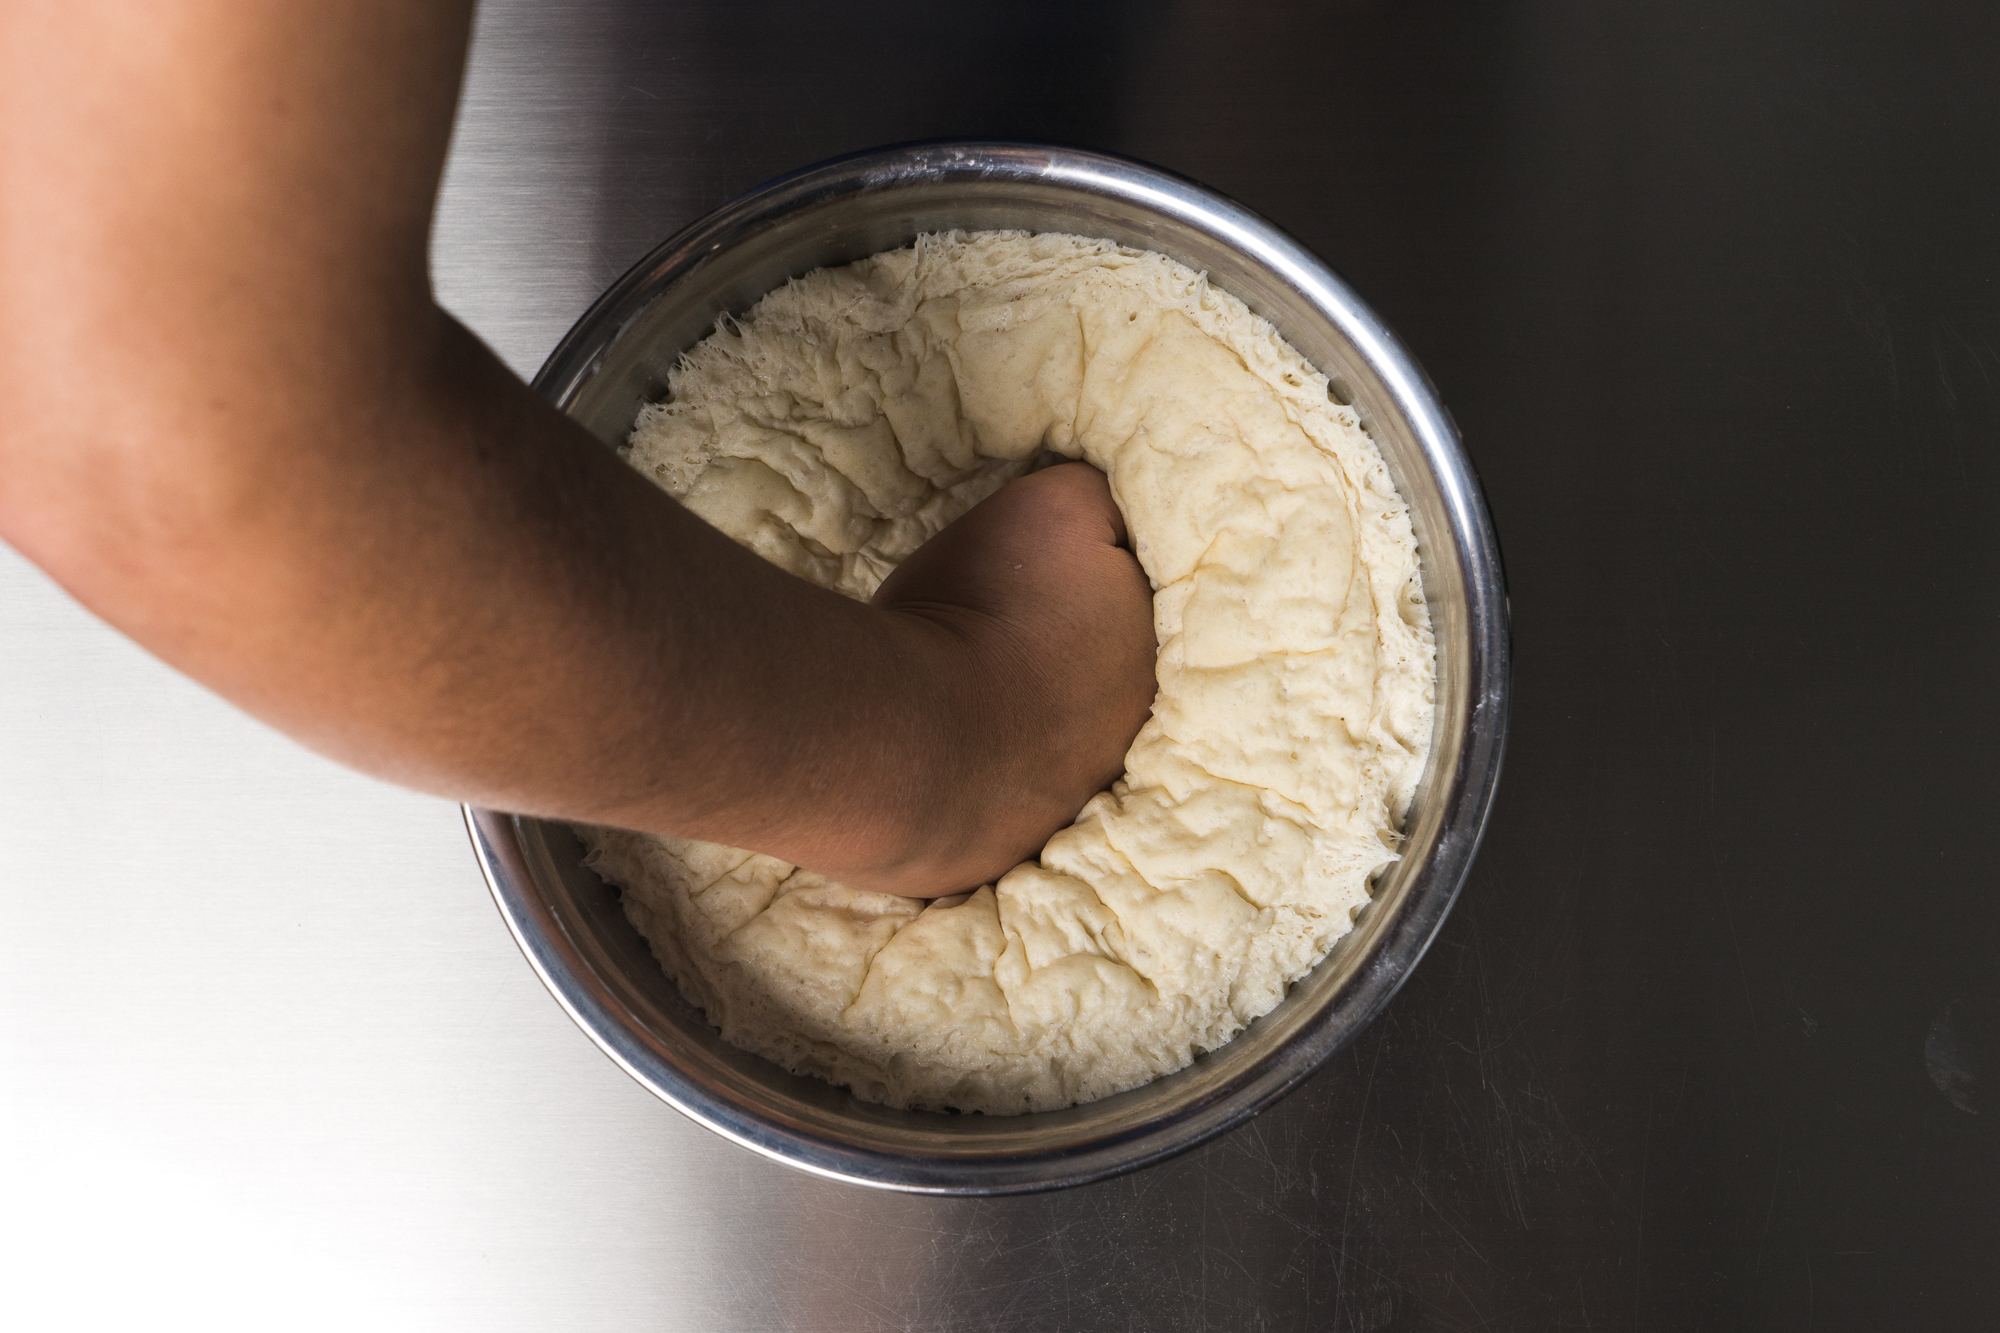
- Once the dough is soft and springy to the touch, gently roll into a ball and place in the greased bowl. Cover with a towel and allow to rise in a warm place for 2 hours or until doubled in size.
- About 10 minutes before the end of the rise time, take a cookie or baking sheet and generously grease with shortening
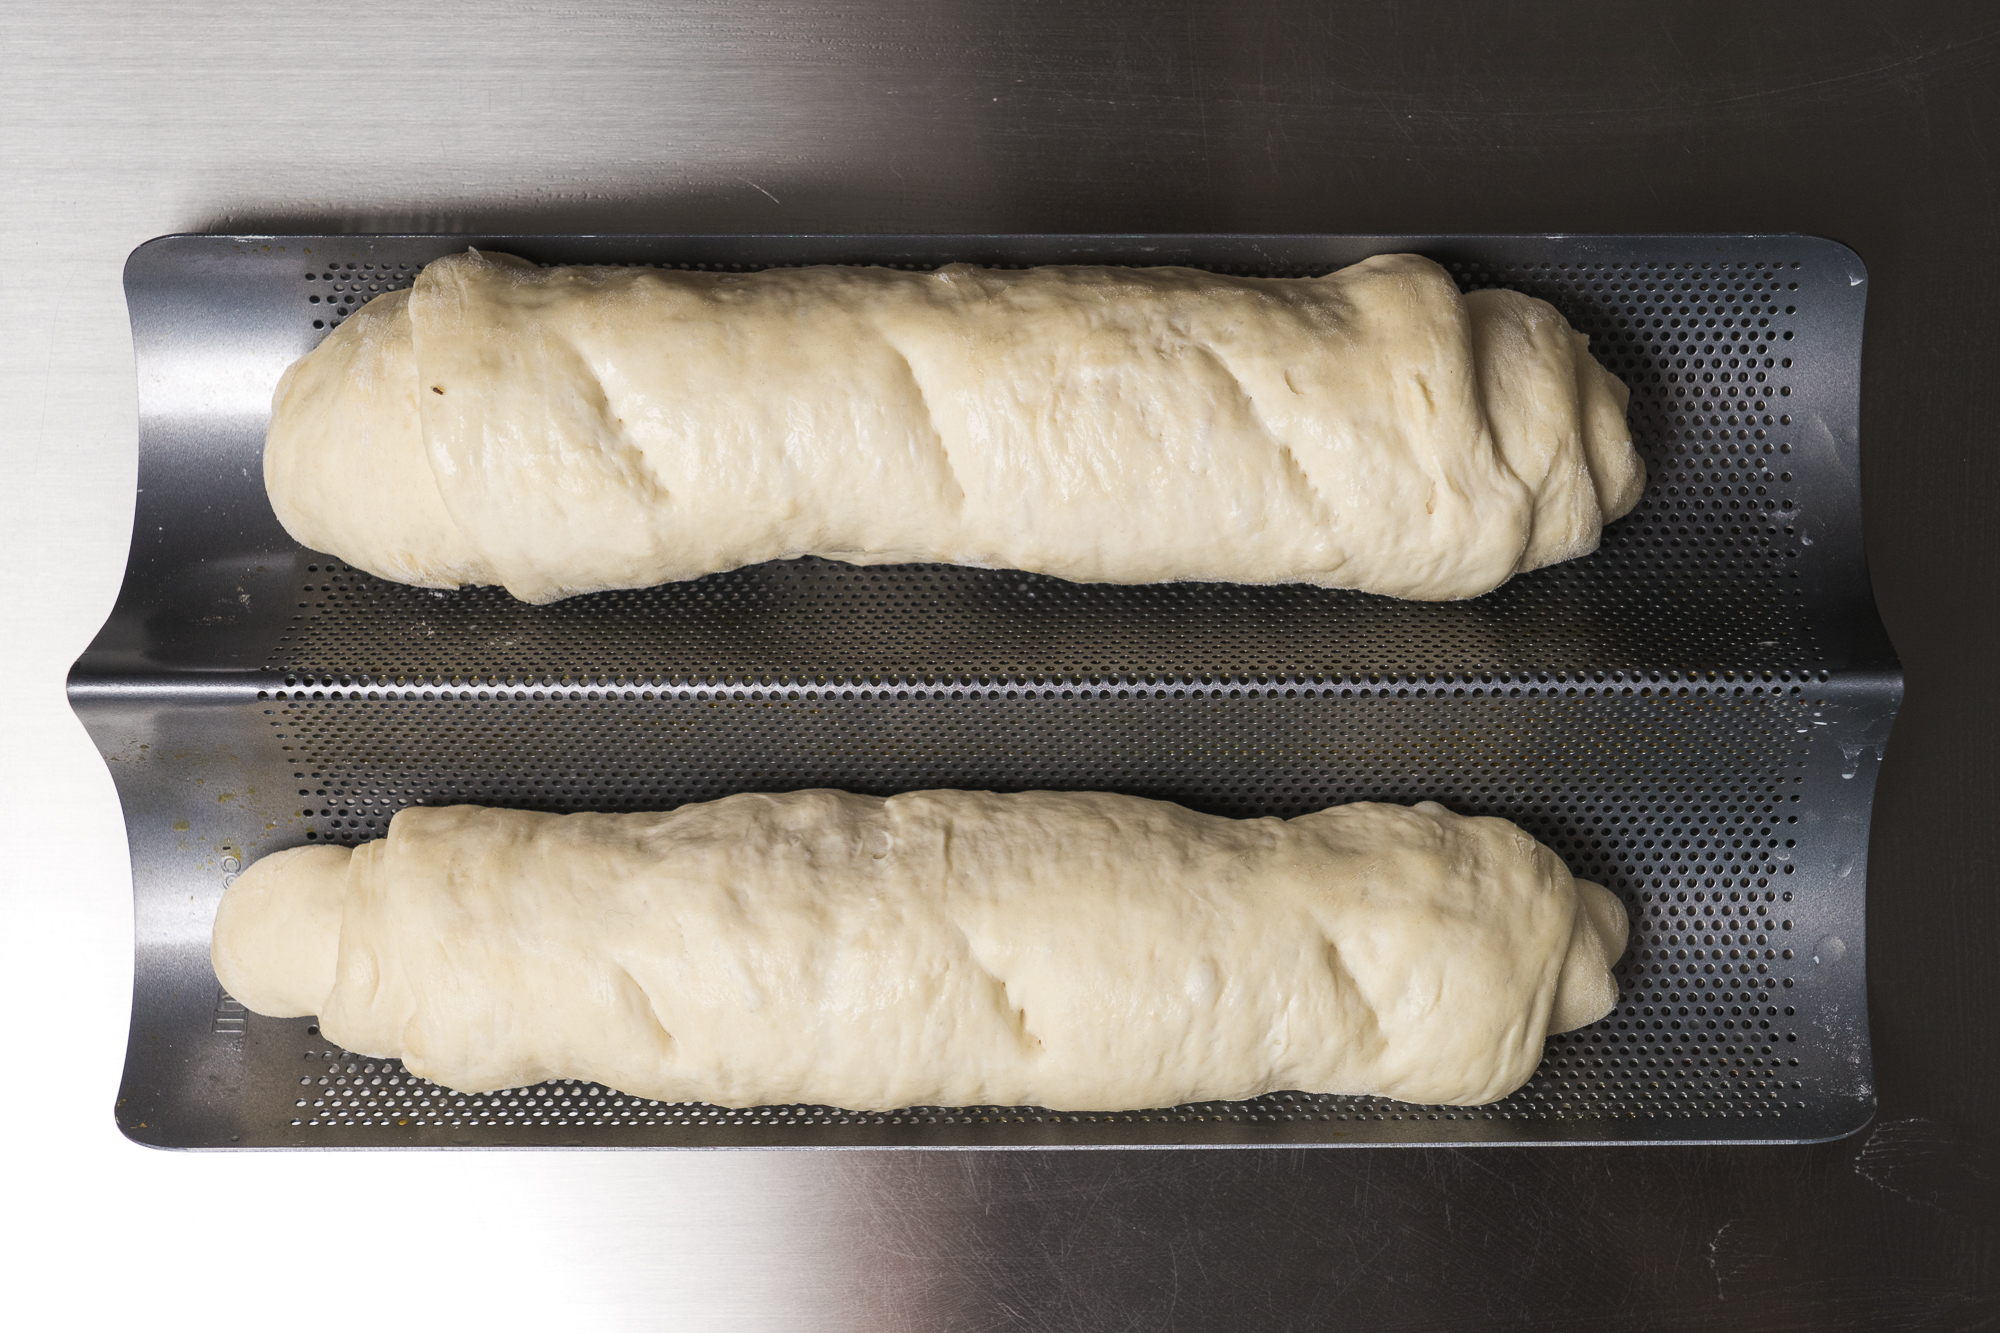
- Punch a hole in the center of the dough to deflate and split the dough into two even halves.
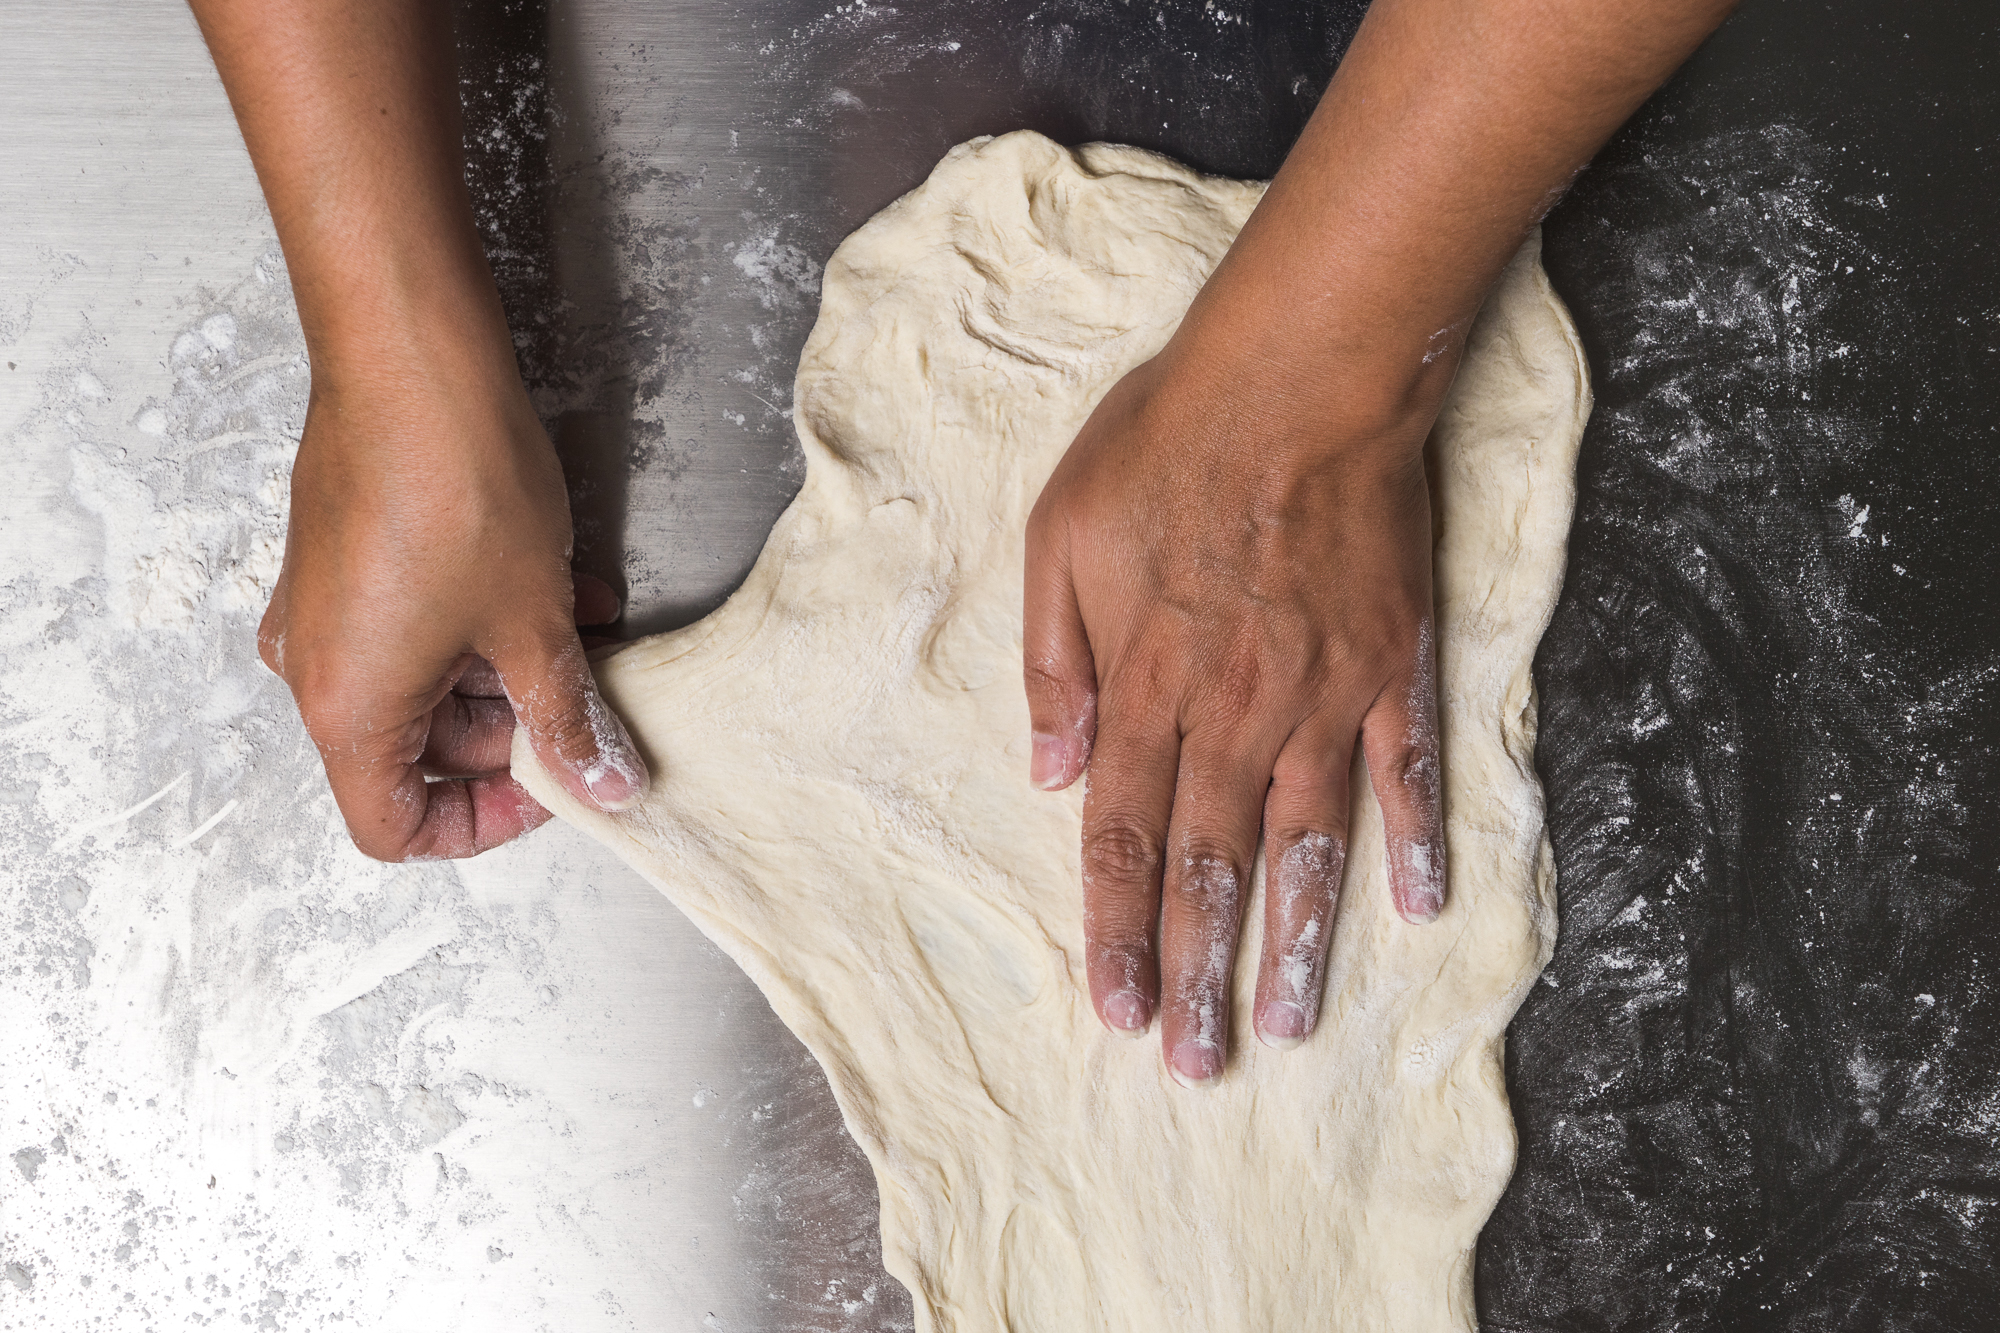
- Using a lightly floured work surface gently roll or shape the dough into a 8-10 inch long rectangle, making sure to gently pull the sides as well to get an even shape.
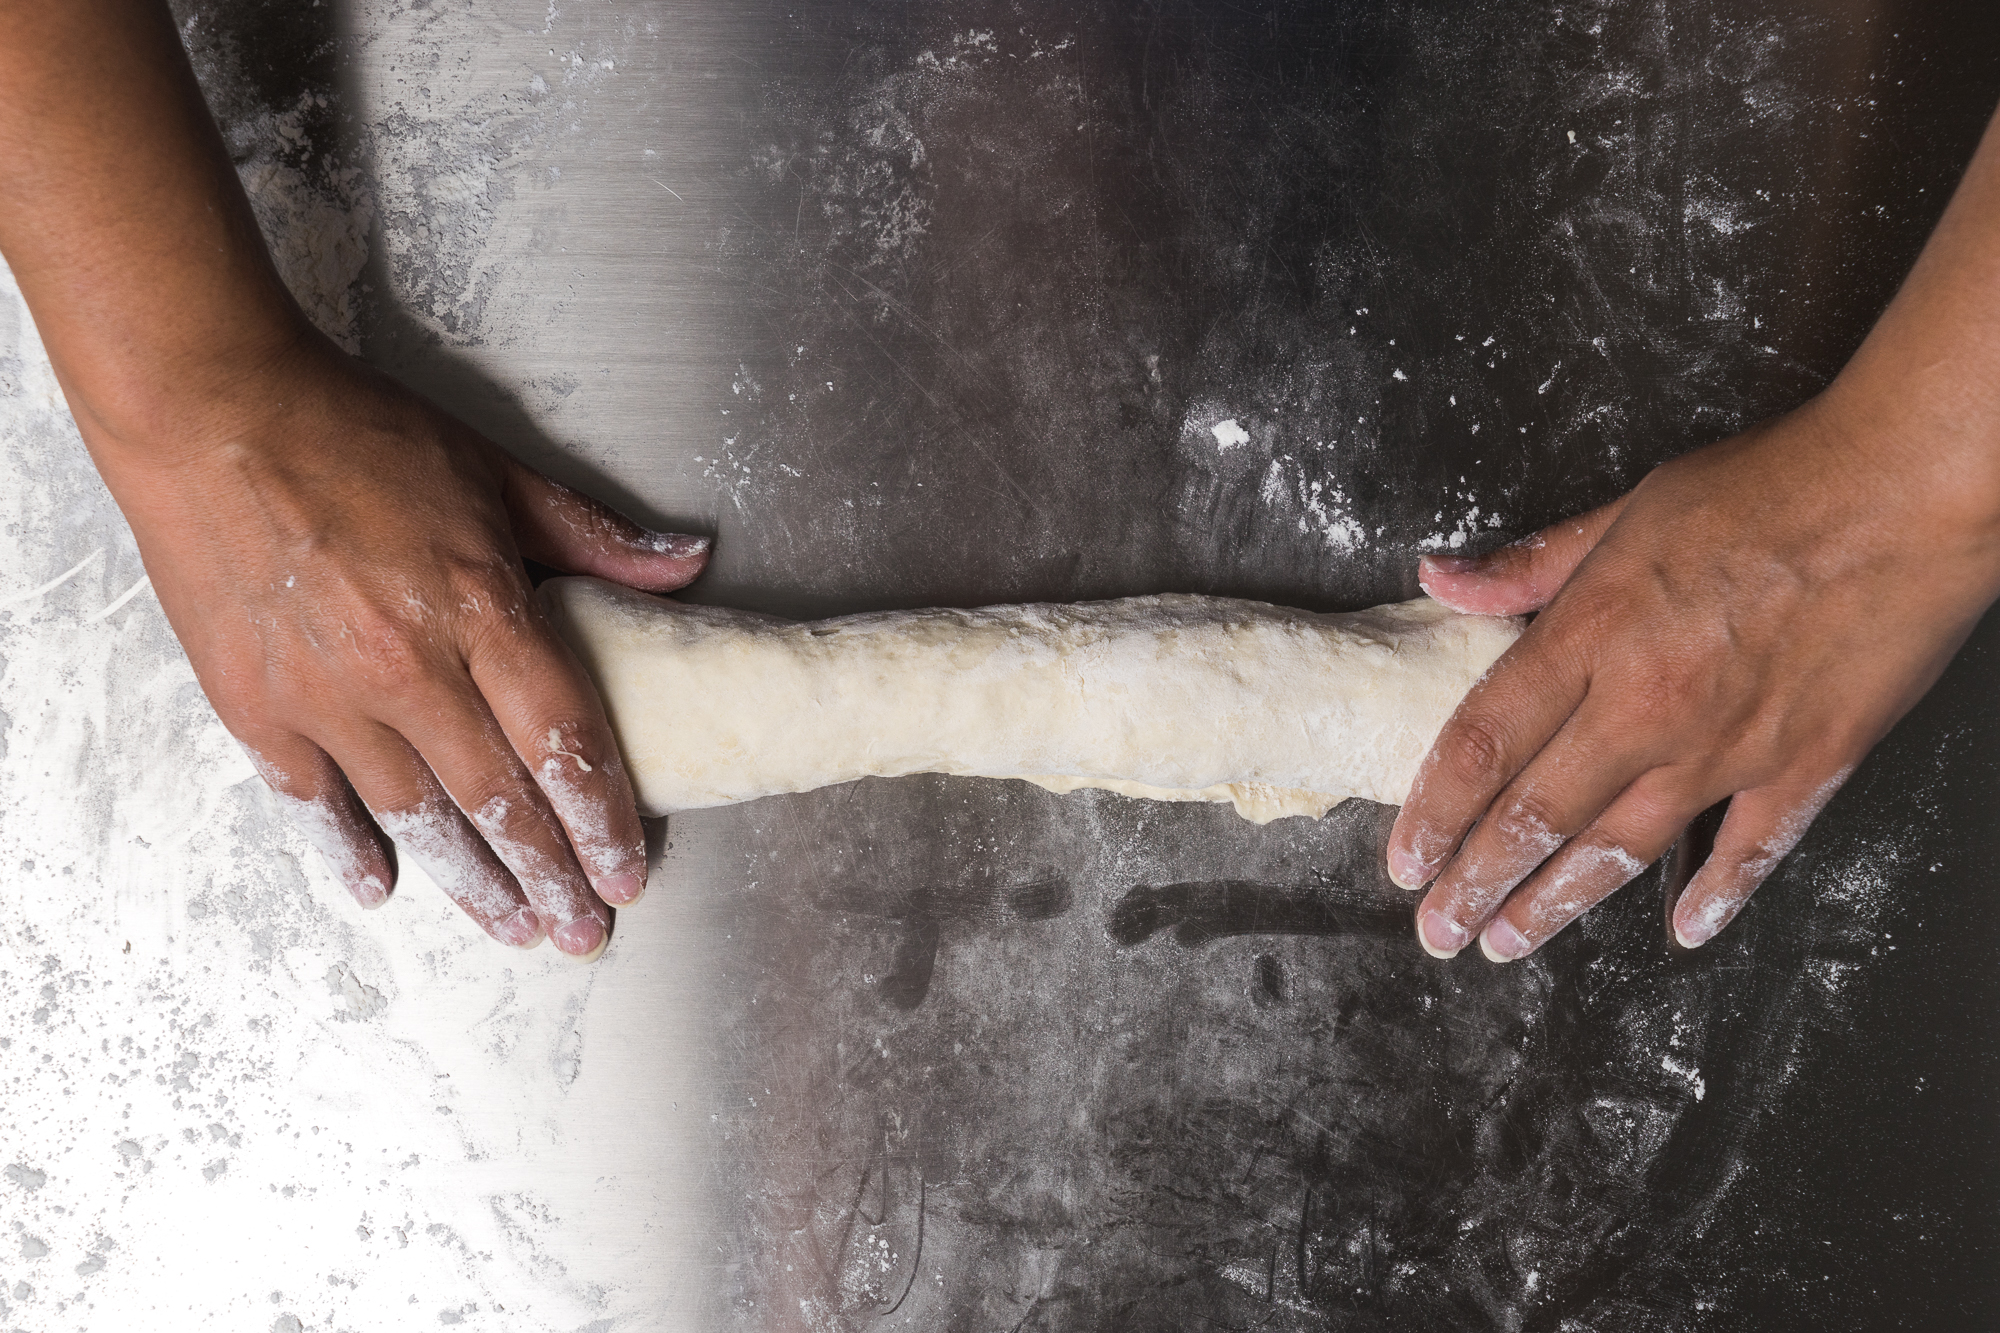
- Roll the dough up from one end to another like you would roll a rug and place on the baking sheet. Repeat with remaining dough
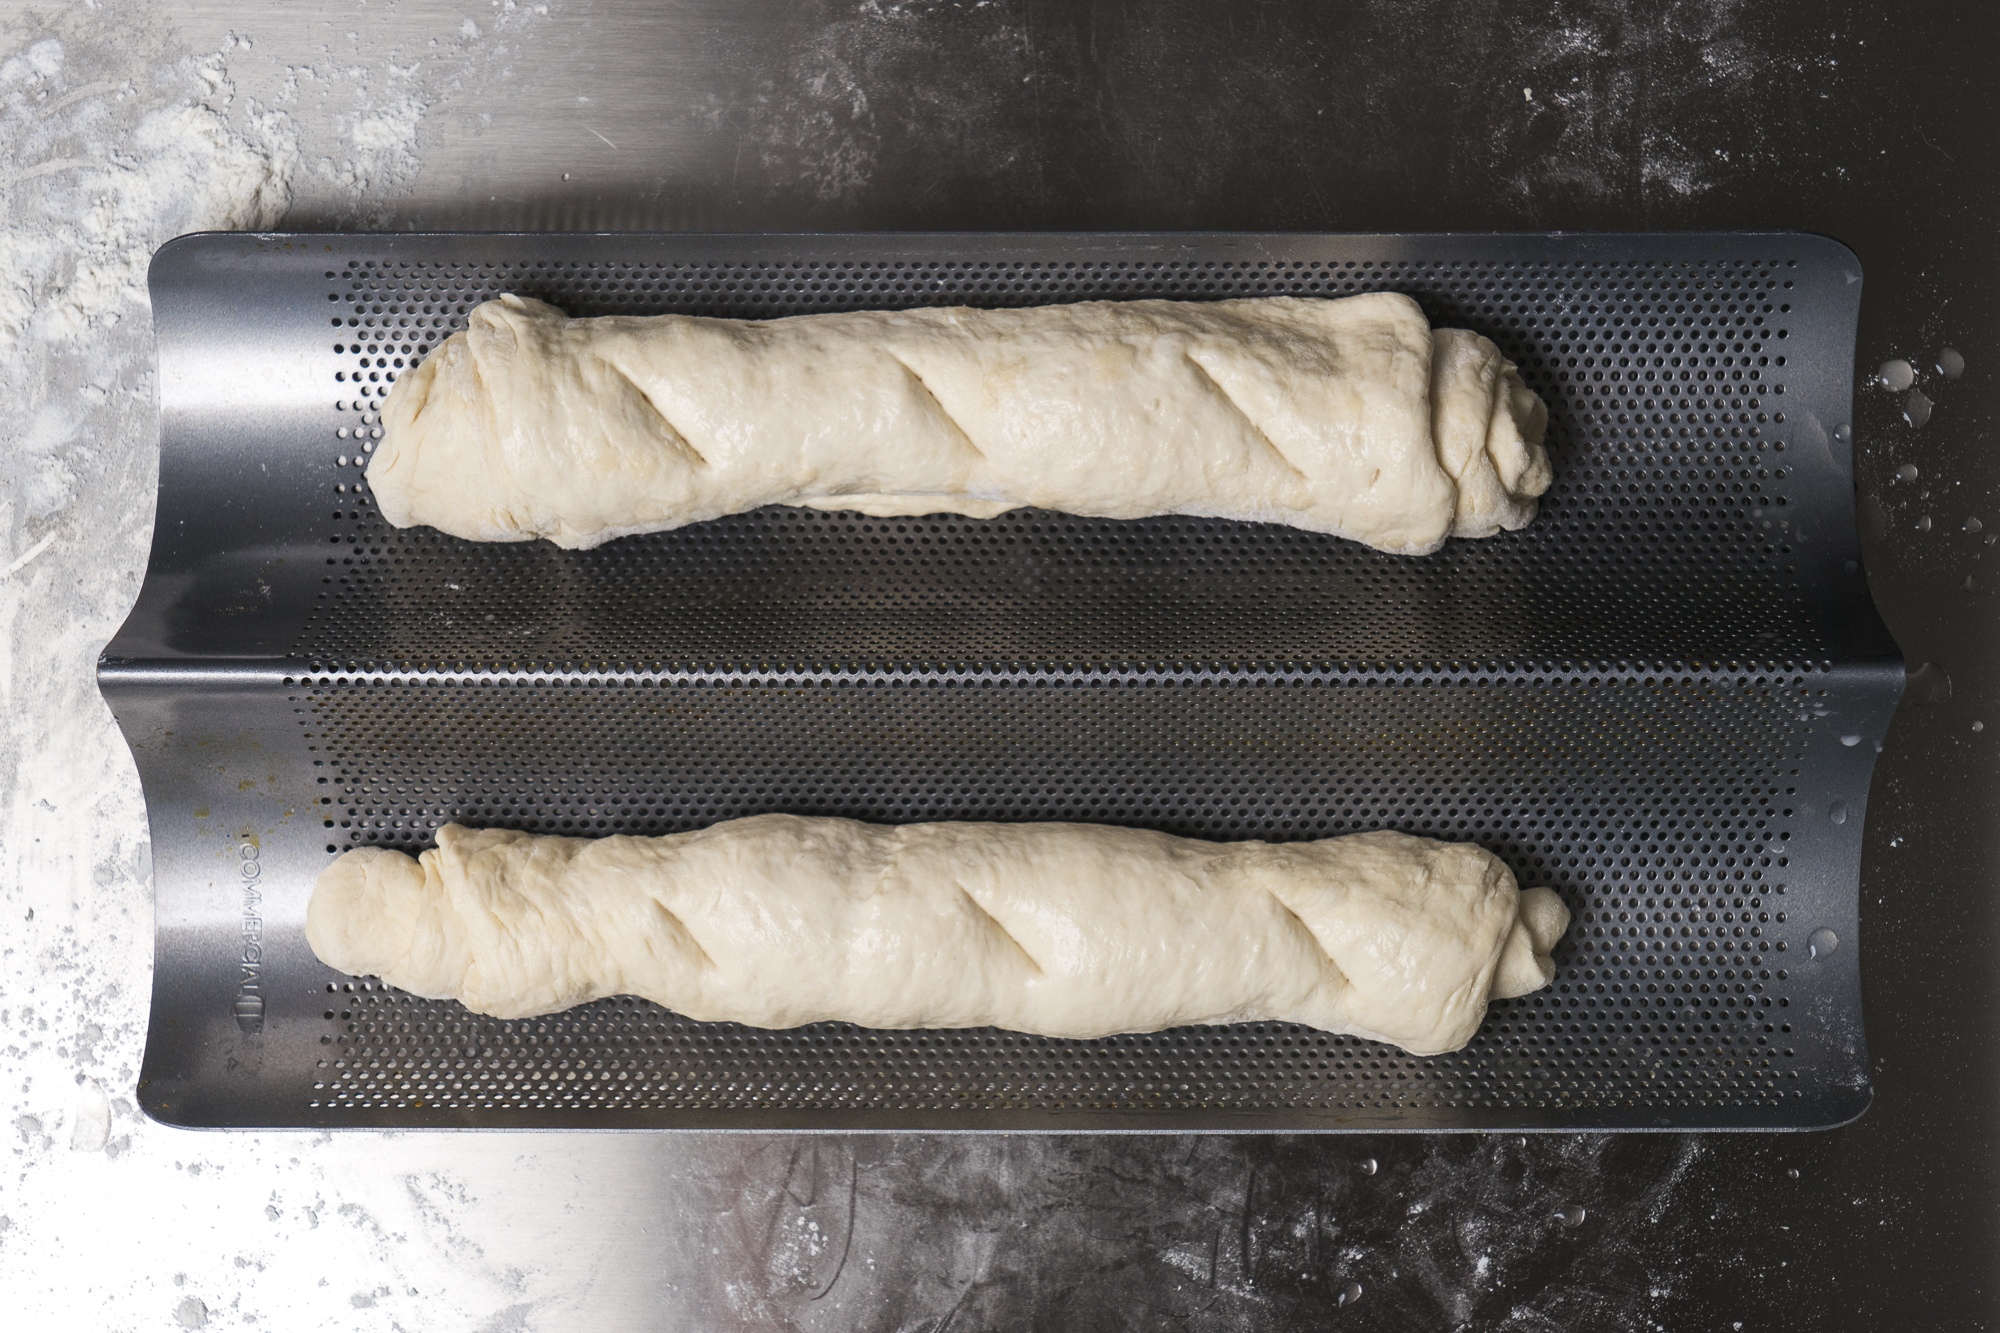
- Take a knife and slice 3 slashes crosswise on each loaf about 1/4 inch deep and gently brush or drip cold water on them, ensuring you dampen the whole length of each loaf
- Cover and let the loaves rise for one hour in a warm place
- While the dough is rising, fill a small oven safe dish half full of water and place in the oven on the bottom rack
- Preheat the oven to 375 degrees F
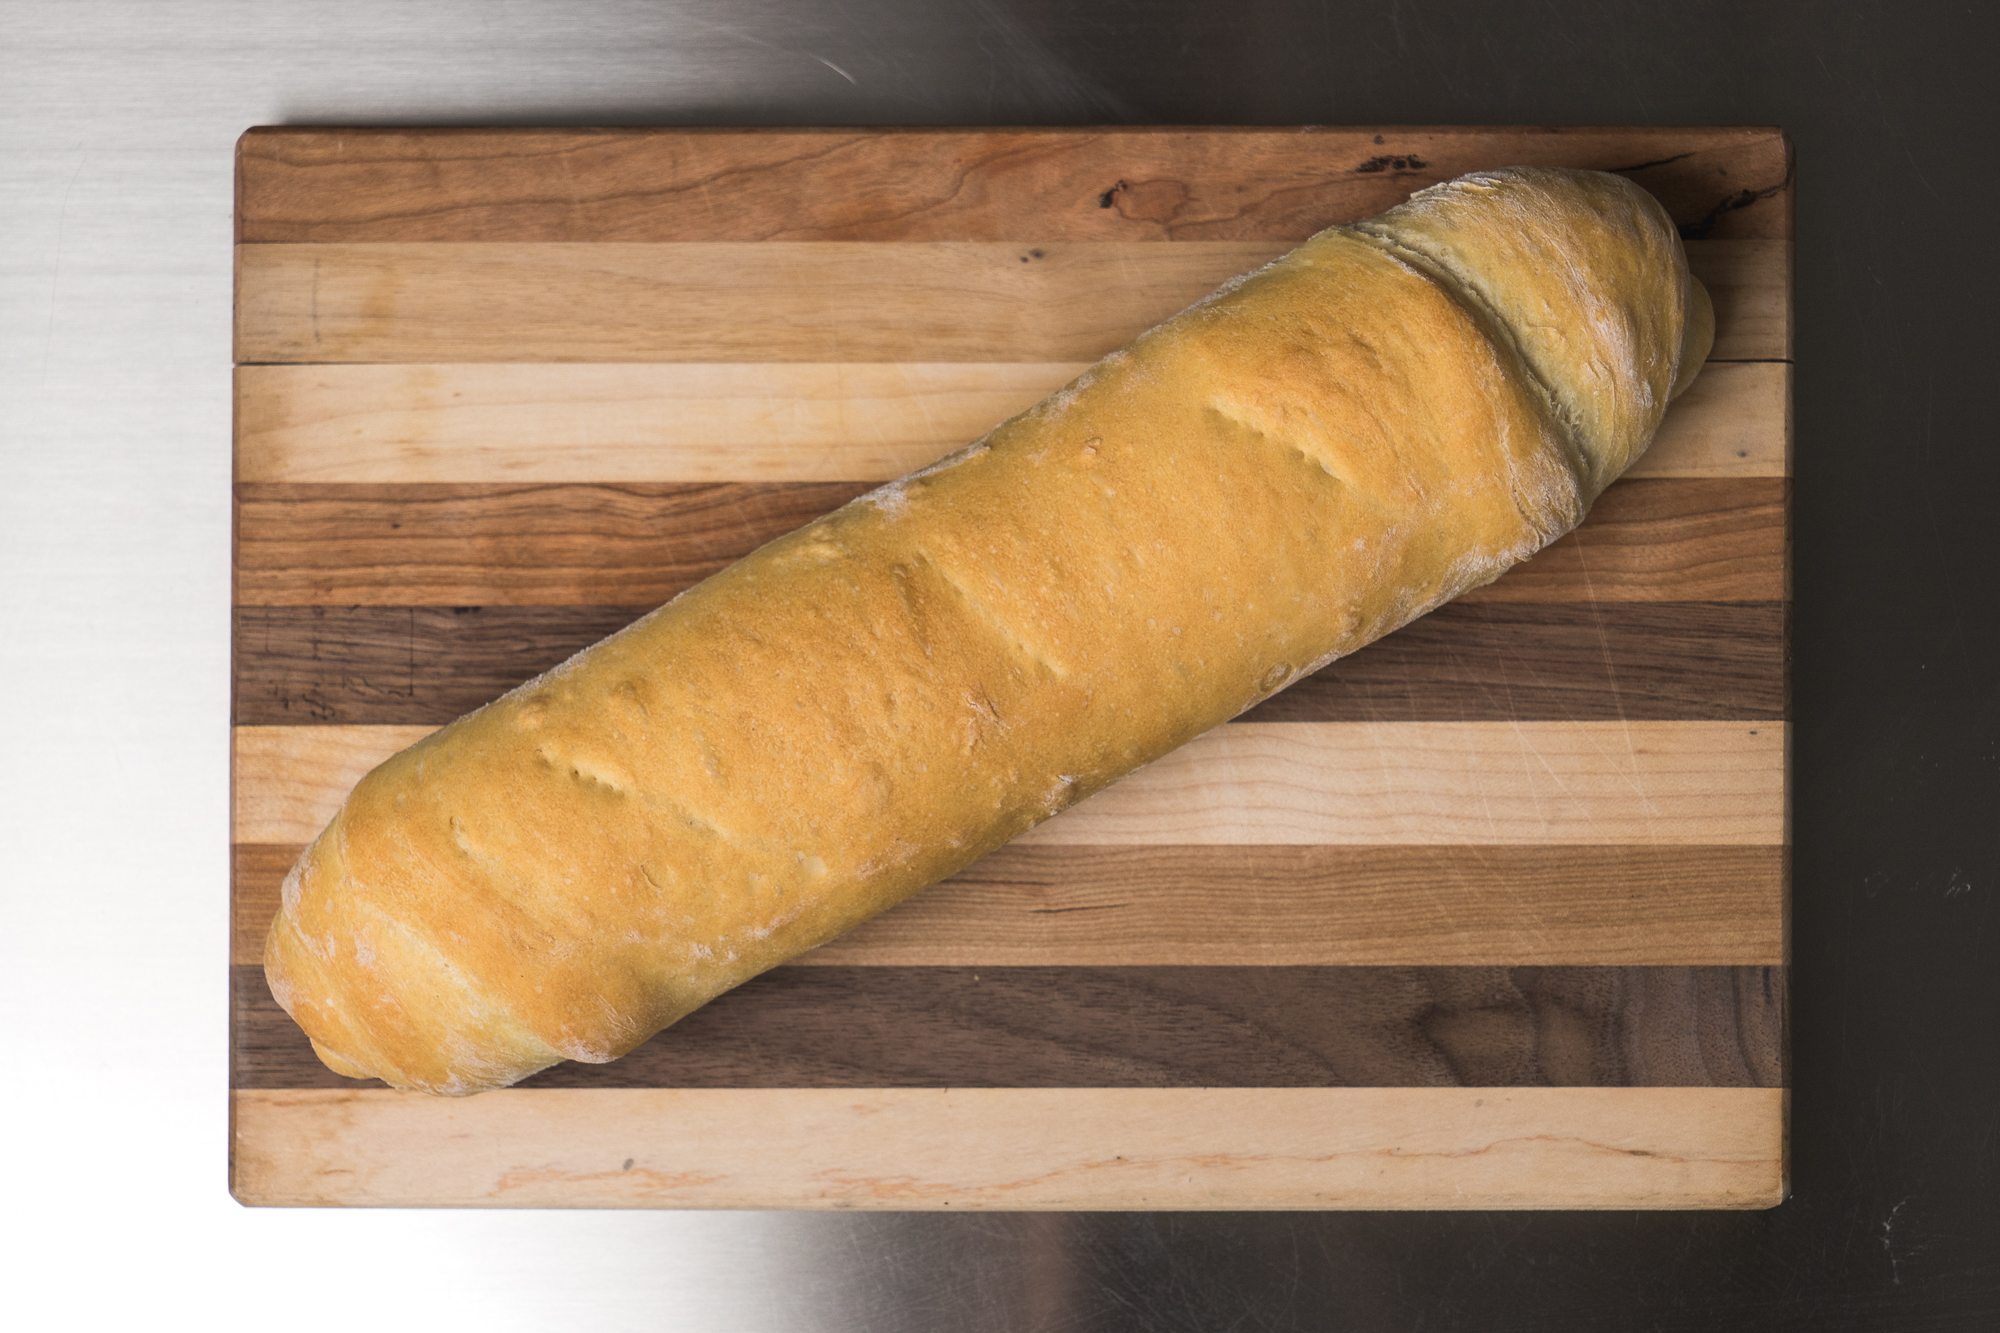
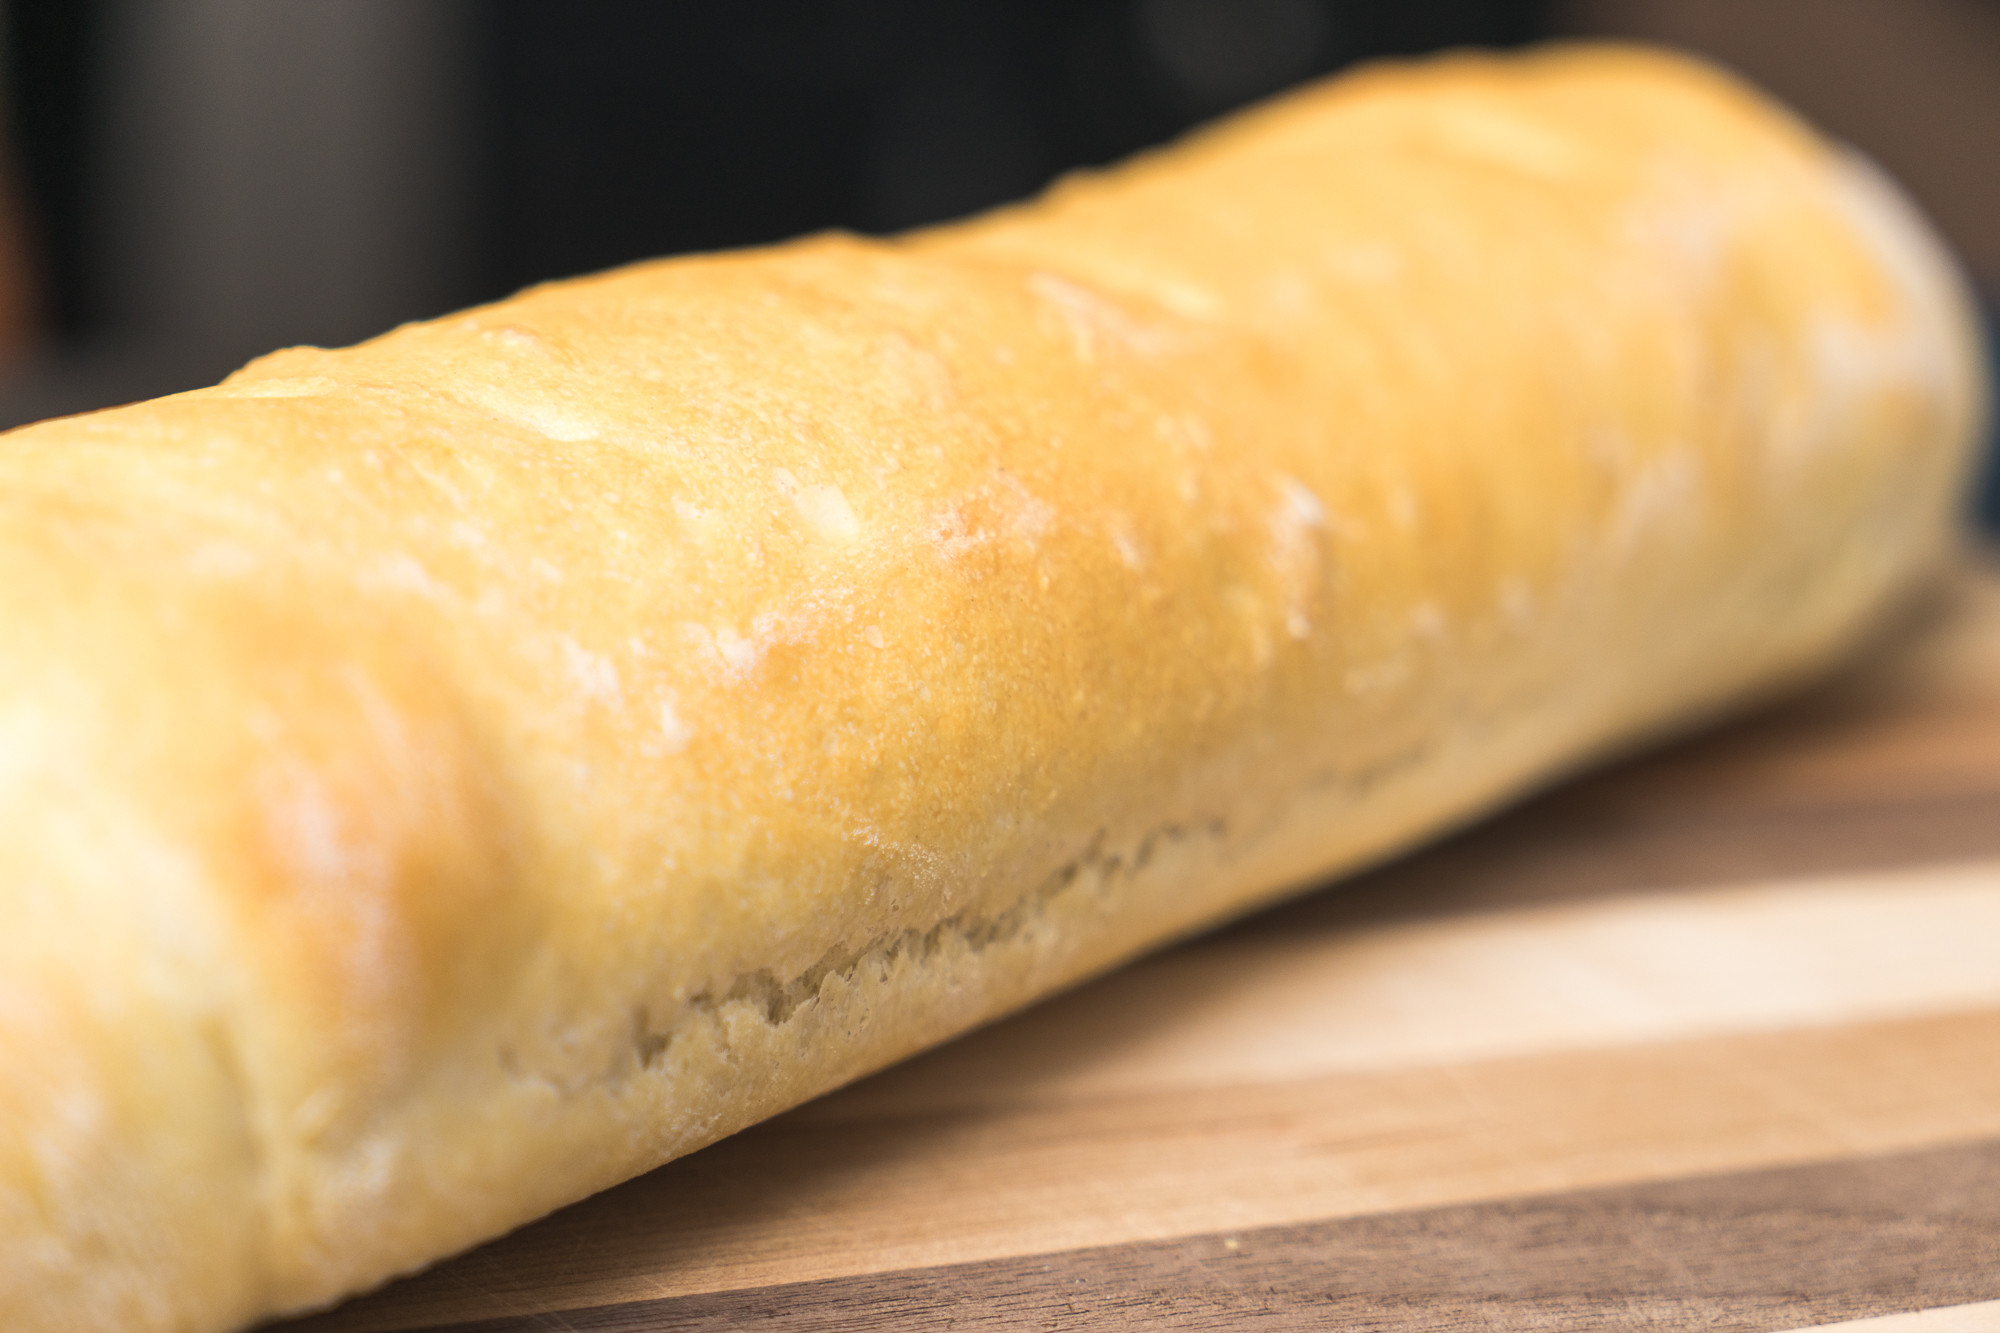
- Remove the cover from bread and gently brush or rub additional cold water on each loaf and place the loaves on the top rack of oven directly over the dish of water and bake for 25-30 minutes or until bread is golden and has a pleasant hollow sound when tapped.
- Remove from sheet and cool on a wire rack.
- Once cool enough to touch without burning yourself but still nice and toasty, slice and enjoy the fruits of your hard work!
Tips
- Making this bread is a bit of a time commitment so try to do it on a day that you are planning on being around the house for a few hours. It’s not all active time, but the dough has to rise for a few hours and will need your attention pretty quickly after it has risen!
- If bread baking becomes more than an occassional activity, I would recommend purchasing pans specifically made to bake French bread on. They are typically sold in most big box stores, on Amazon and of course home goods stores. They ensure your loaf maintains that beautiful shape and have holes to give your bread air ciculation which helps form that lovely crust.
This bread is amazing all on it's own but there is so much you can do with it! Here are a few of our favorite ways to enjoy this bread.
Bread with Oil
Garlic Bread
Meatball Subs